How I Turned a $10 Thrifted Chair into a Stunning Revamp

I’m always on the lookout for unique pieces when thrifting, and this $10 chair caught my eye instantly. The chair had so much character with its beautiful scalloped edges and fluted legs, but that fabric? Not my favorite. I knew I could give it a fresh look while still maintaining its vintage charm, so I took it home and got to work!
Total cost for entire makeover: Approximately $20

Before - Thrifted Chair
Products I Used:
Green EZ Chemical Stripper – for removing the old finish
220-grit Sandpaper – for smoothing the surface
Paint brushes - For applying stain & pre-stain
Dark Walnut Gel Stain – for a rich, deep wood tone
Spray Finish Sealer – for protecting the new stain
Earthy Green Upholstery Fabric – from Joann Fabrics
Staple Gun – for reattaching the new fabric
Step 1: Stripping the Old Finish
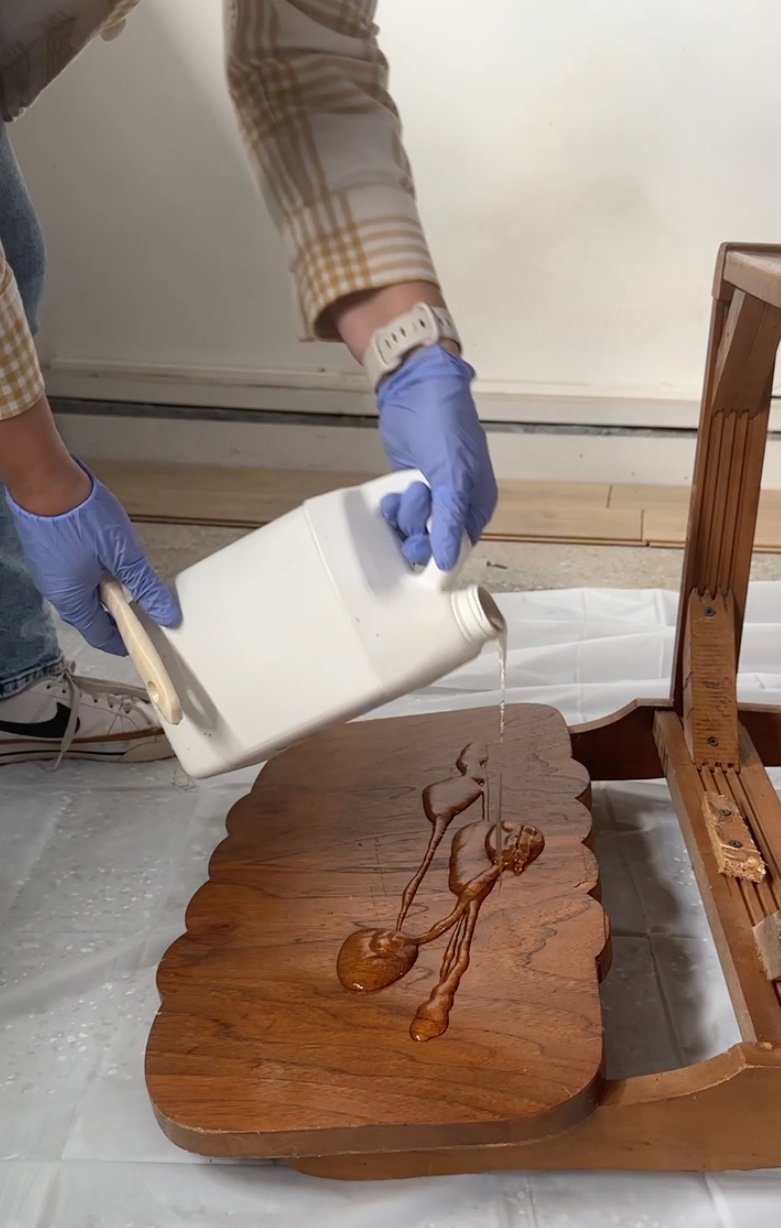
The first step in this transformation was stripping the old finish off the wood. I used Green EZ chemical stripper, which made the process super simple and quick. This product is perfect for getting into all those detailed areas without needing to sand every nook and cranny.
I love using a $1 shower curtain from the Dollar Tree to lay down before I use the chemical stripper. It makes clean up a breeze!
Green EZ also makes a cleaner spray that cleans off the remnants of the stripper after. I like to spray this on before I scrub off the finish in the small detailed spaces like the fluted legs. The scrub brushes that I use are from the Dollar Tree too! I buy at least 5 packages of these at a time, because they are great (and inexpensive) to have on hand.
Step 2: Sanding and Staining the Wood
After stripping, I gave the chair a light sanding with 220-grit sandpaper to smooth out the surface and prep it for stain.

While a pre-stain isn’t necessary when using a gel stain, I still like to use it as a precaution to ensure a nice even stain. I apply with a paint brush and wipe back the excess with a lint free cloth.
I decided to go with a dark walnut gel stain because I wanted to enhance the natural beauty of the wood while giving it a rich, classic feel. The stain brought out the grain and gave the chair that deep, luxurious look I was going for.
Tip: Gel stain is ideal for woods with varying grains and textures because it sits on the surface rather than fully penetrating like traditional stains. This gives you more control over the color and ensures a more even, consistent finish across different types of wood. It’s especially useful when working with mixed or uneven woods, as it minimizes blotching and highlights the natural beauty of the wood grain without the risk of uneven absorption.
Step 3: Sealing the Finish
To protect the newly stained wood, I used a spray finish sealer. While spray finishes are convenient, I did need to apply 3-4 coats for the best protection & consistent finish.
I prefer to use Minwax water based poly and spray it in my paint sprayer; however, my paint sprayer was at a different property so I used what I had on hand.
Step 4: Reupholstering the Seat
The original fabric had seen better days, so I removed it using a staple remover (you can also use a flathead screwdriver if you don’t have one). Once the seat was bare, I replaced it with this beautiful earthy green fabric that I found on sale at Joann Fabrics. Using a staple gun, I secured the fabric in place, making sure it was tight and smooth across the seat.
The Final Result
And here’s the finished look! My $10 thrifted chair now looks completely refreshed, with a combination of vintage charm and modern touches. The total cost? Just $20 since I already had most of the supplies on hand. Not bad for a one-of-a-kind, custom piece!
This project goes to show that you can breathe new life into thrifted finds with just a few products and a little creativity. Would you try revamping a thrifted chair? Let me know your thoughts in the comments below!


