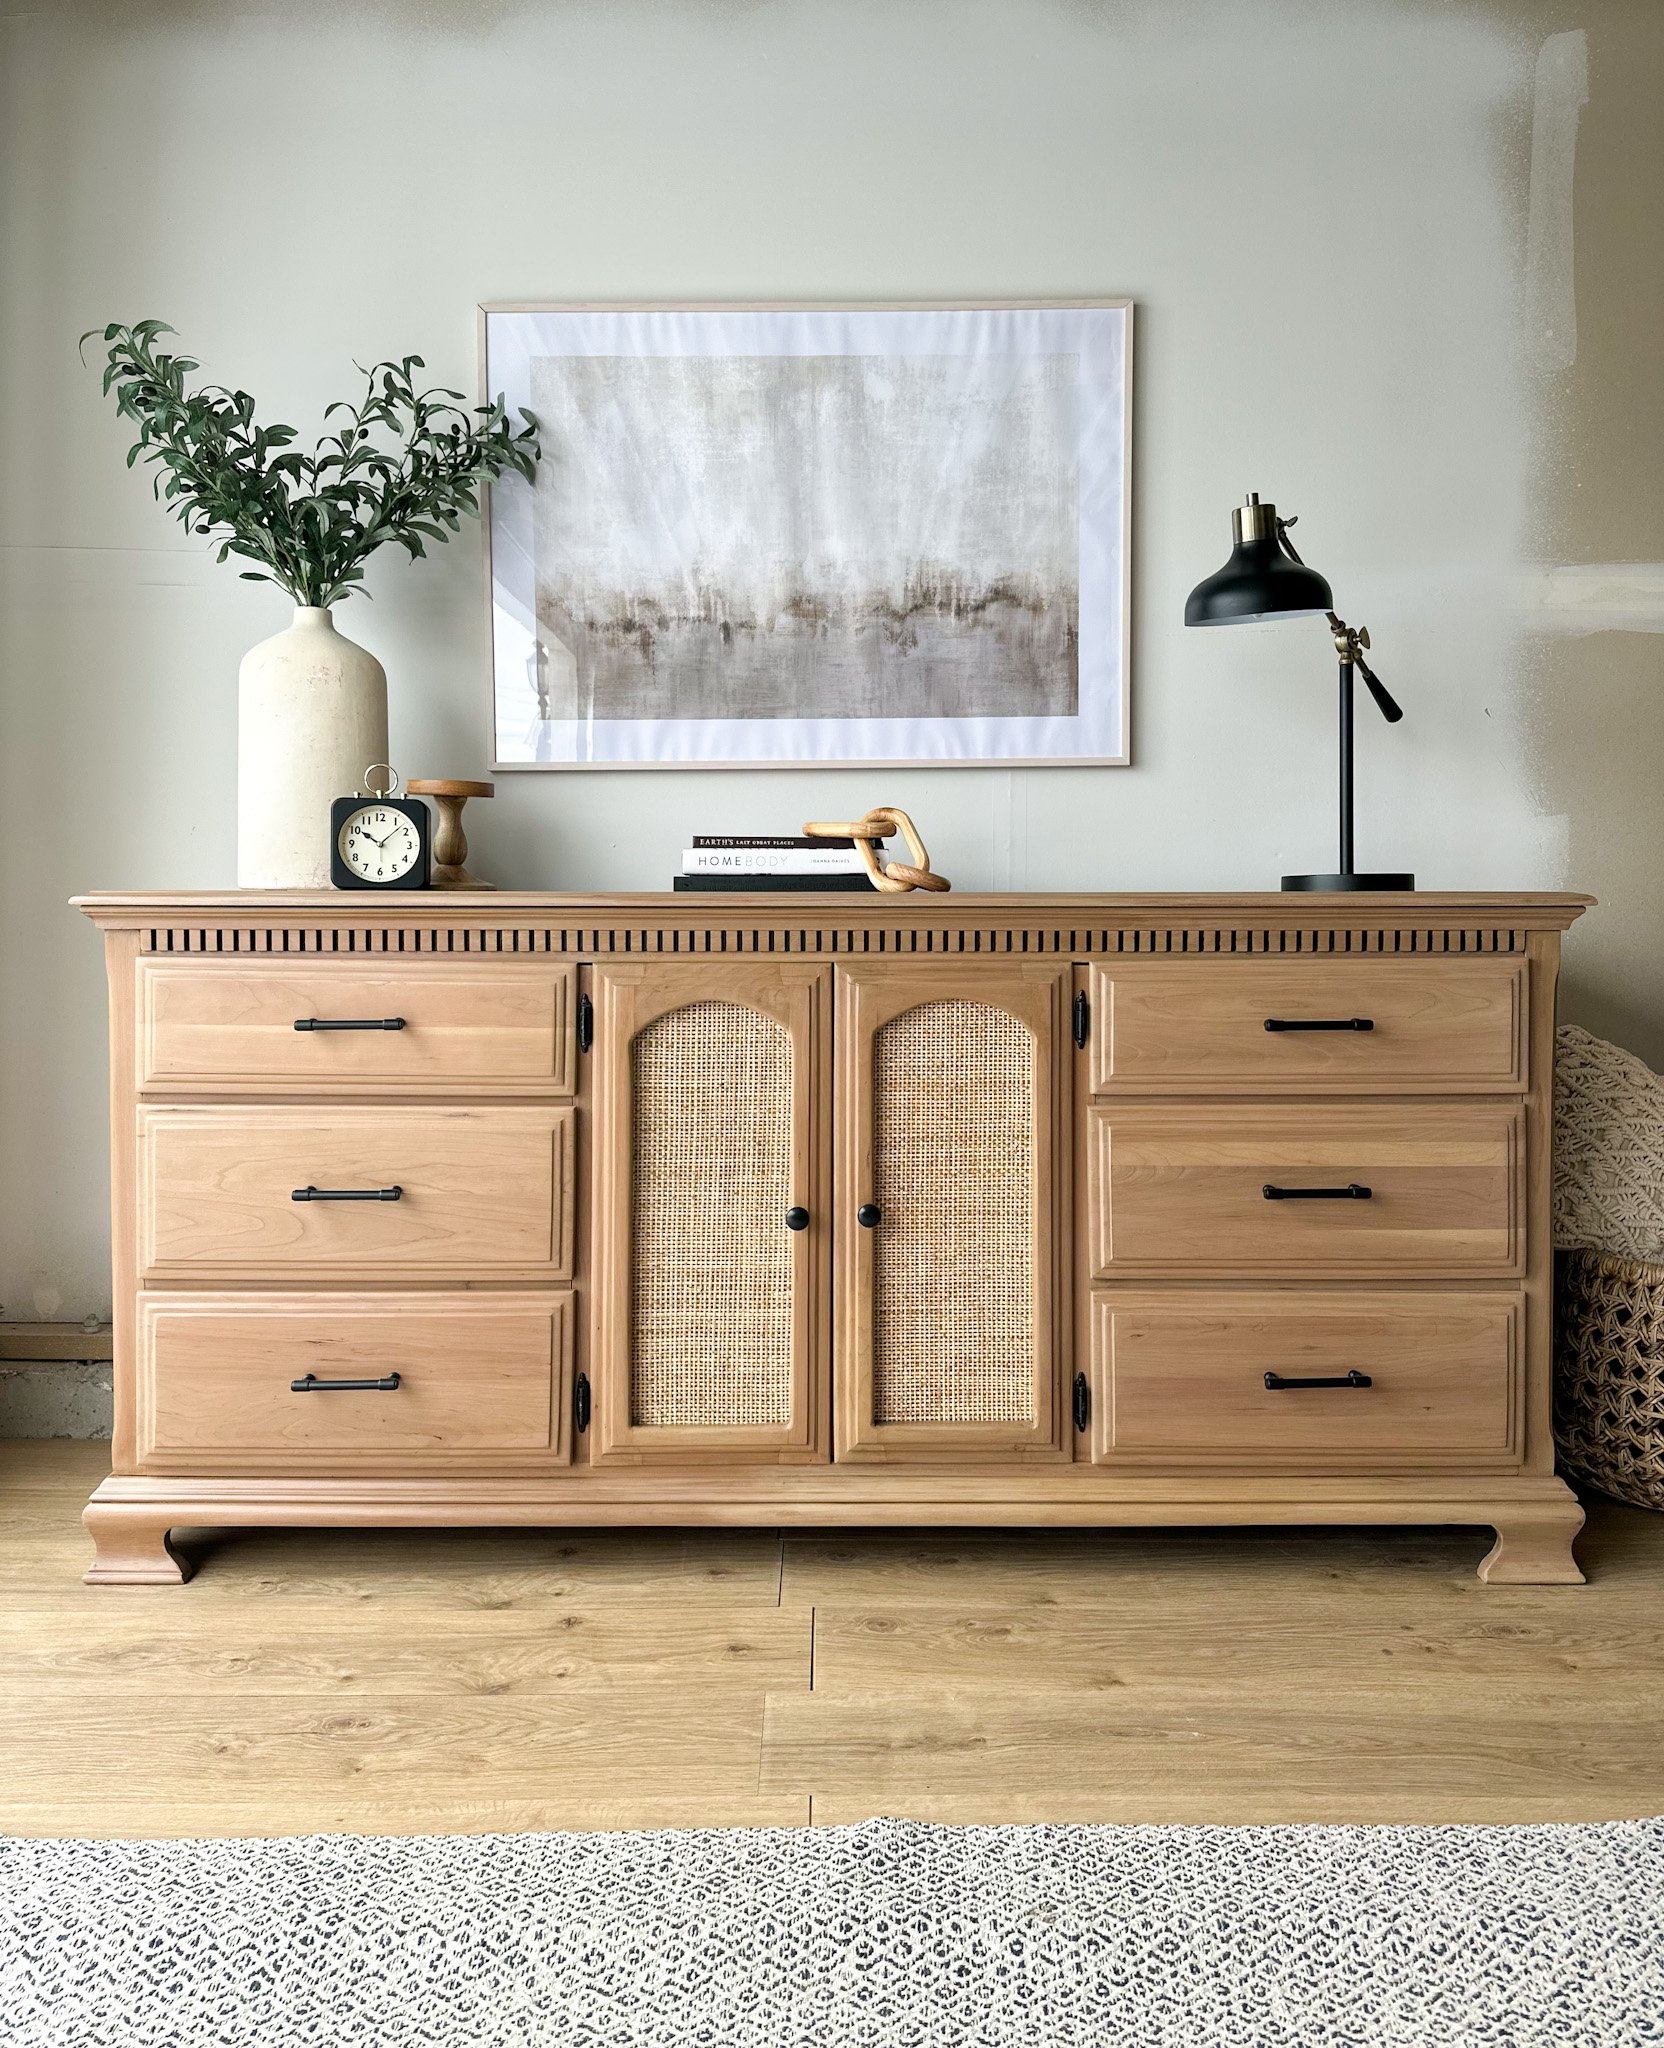
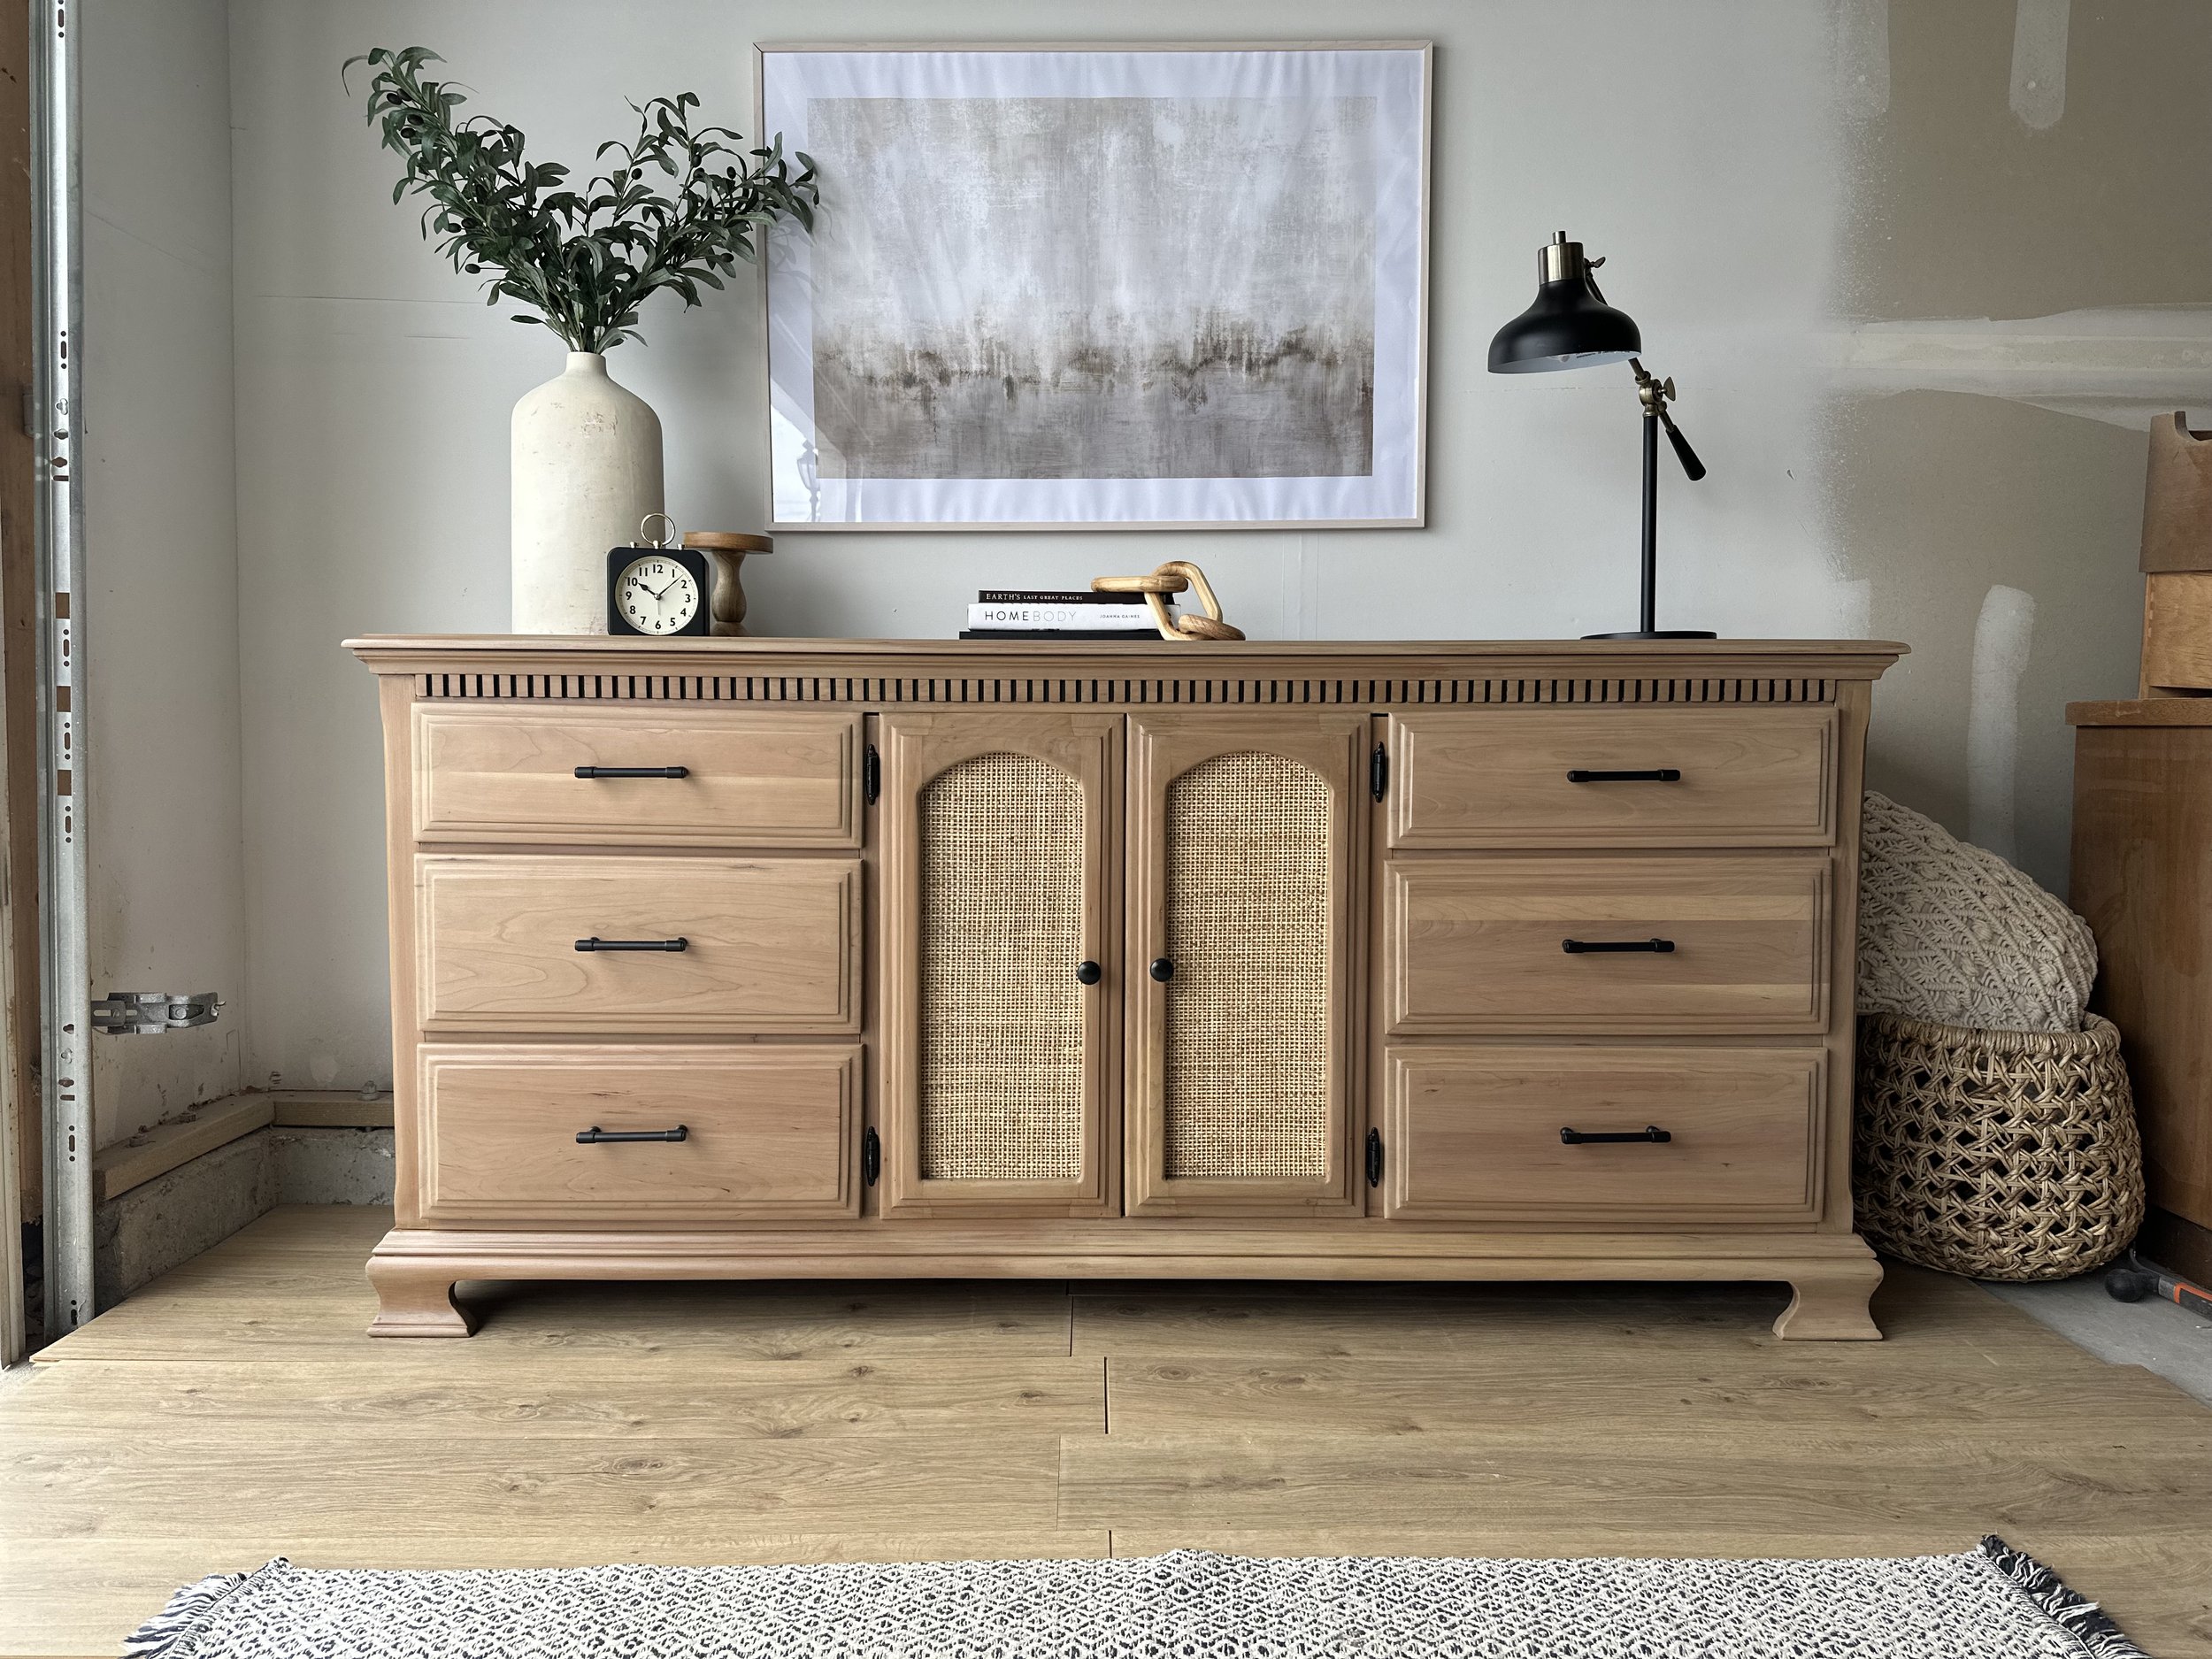
Outdated Dresser Gets Huge Makeover

Have you been thrifting or scrolling through Facebook Marketplace and come across a dresser that has really outdated doors? You know what I’m talking about…..those doors with the very ornate trim that just screams “even if you paint me, I’ll still look old!”. I usually pass on these almost immediately because I love making old, outdated pieces super modern; however, this time was different!
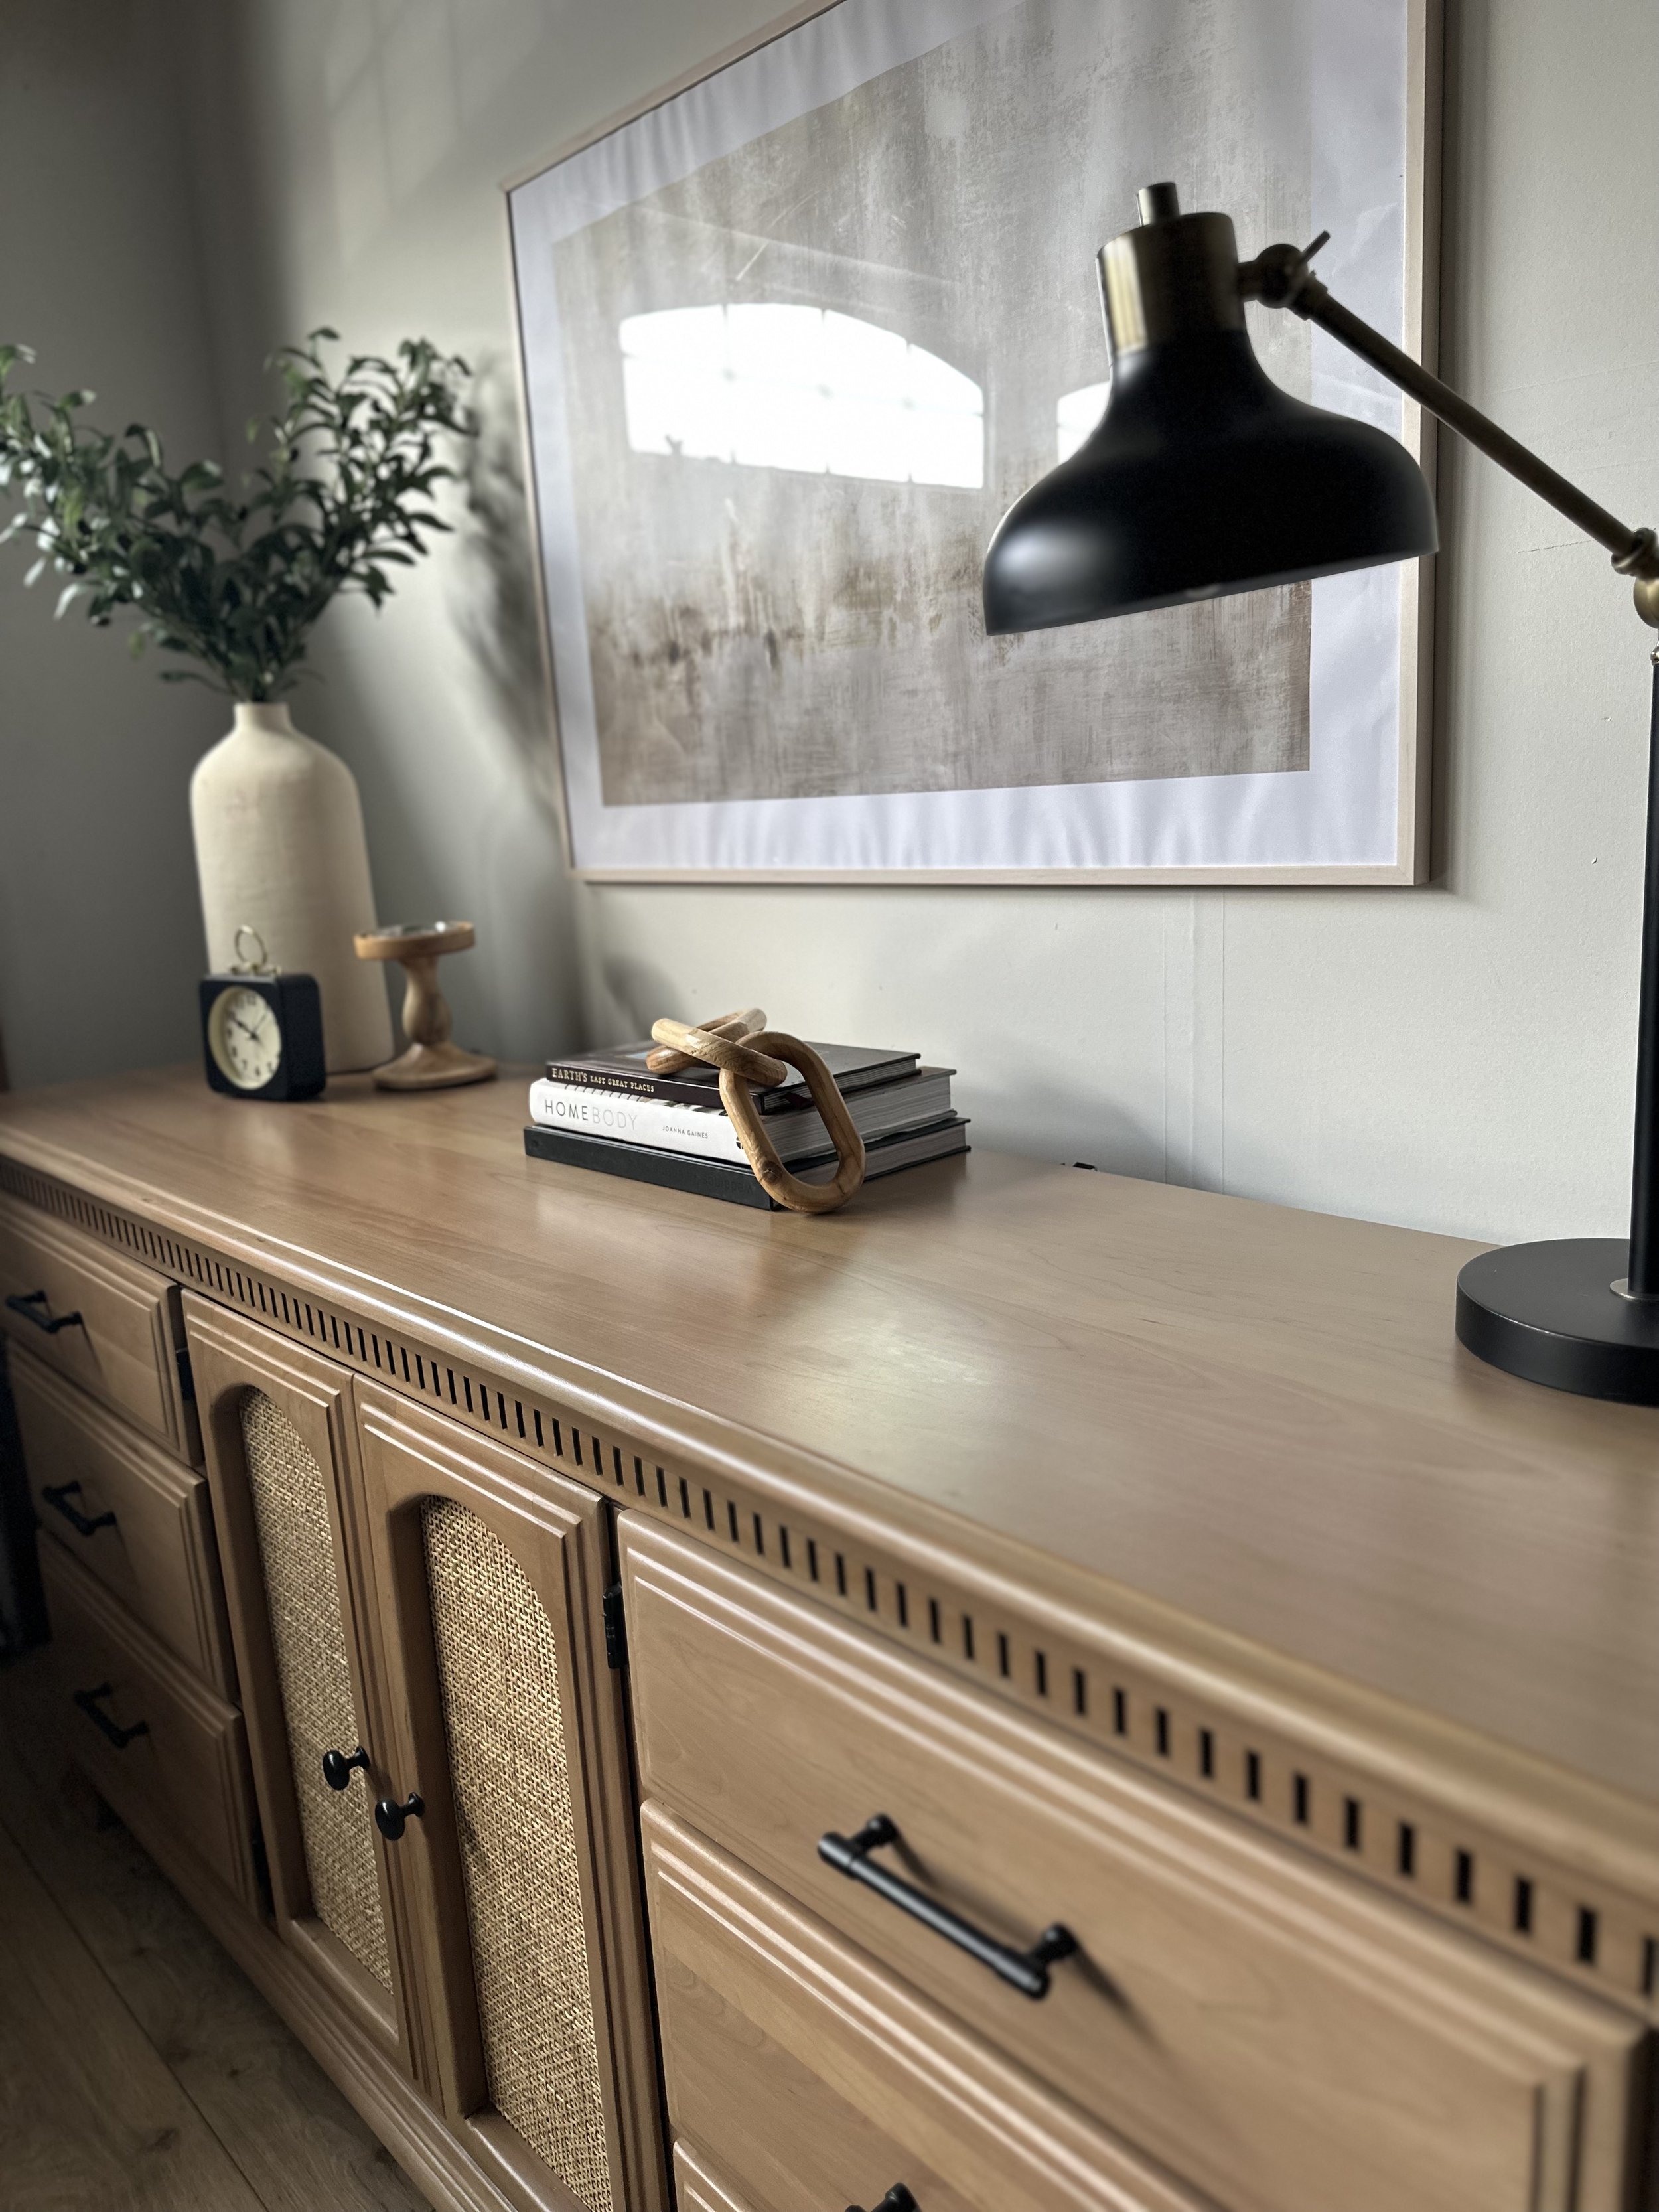
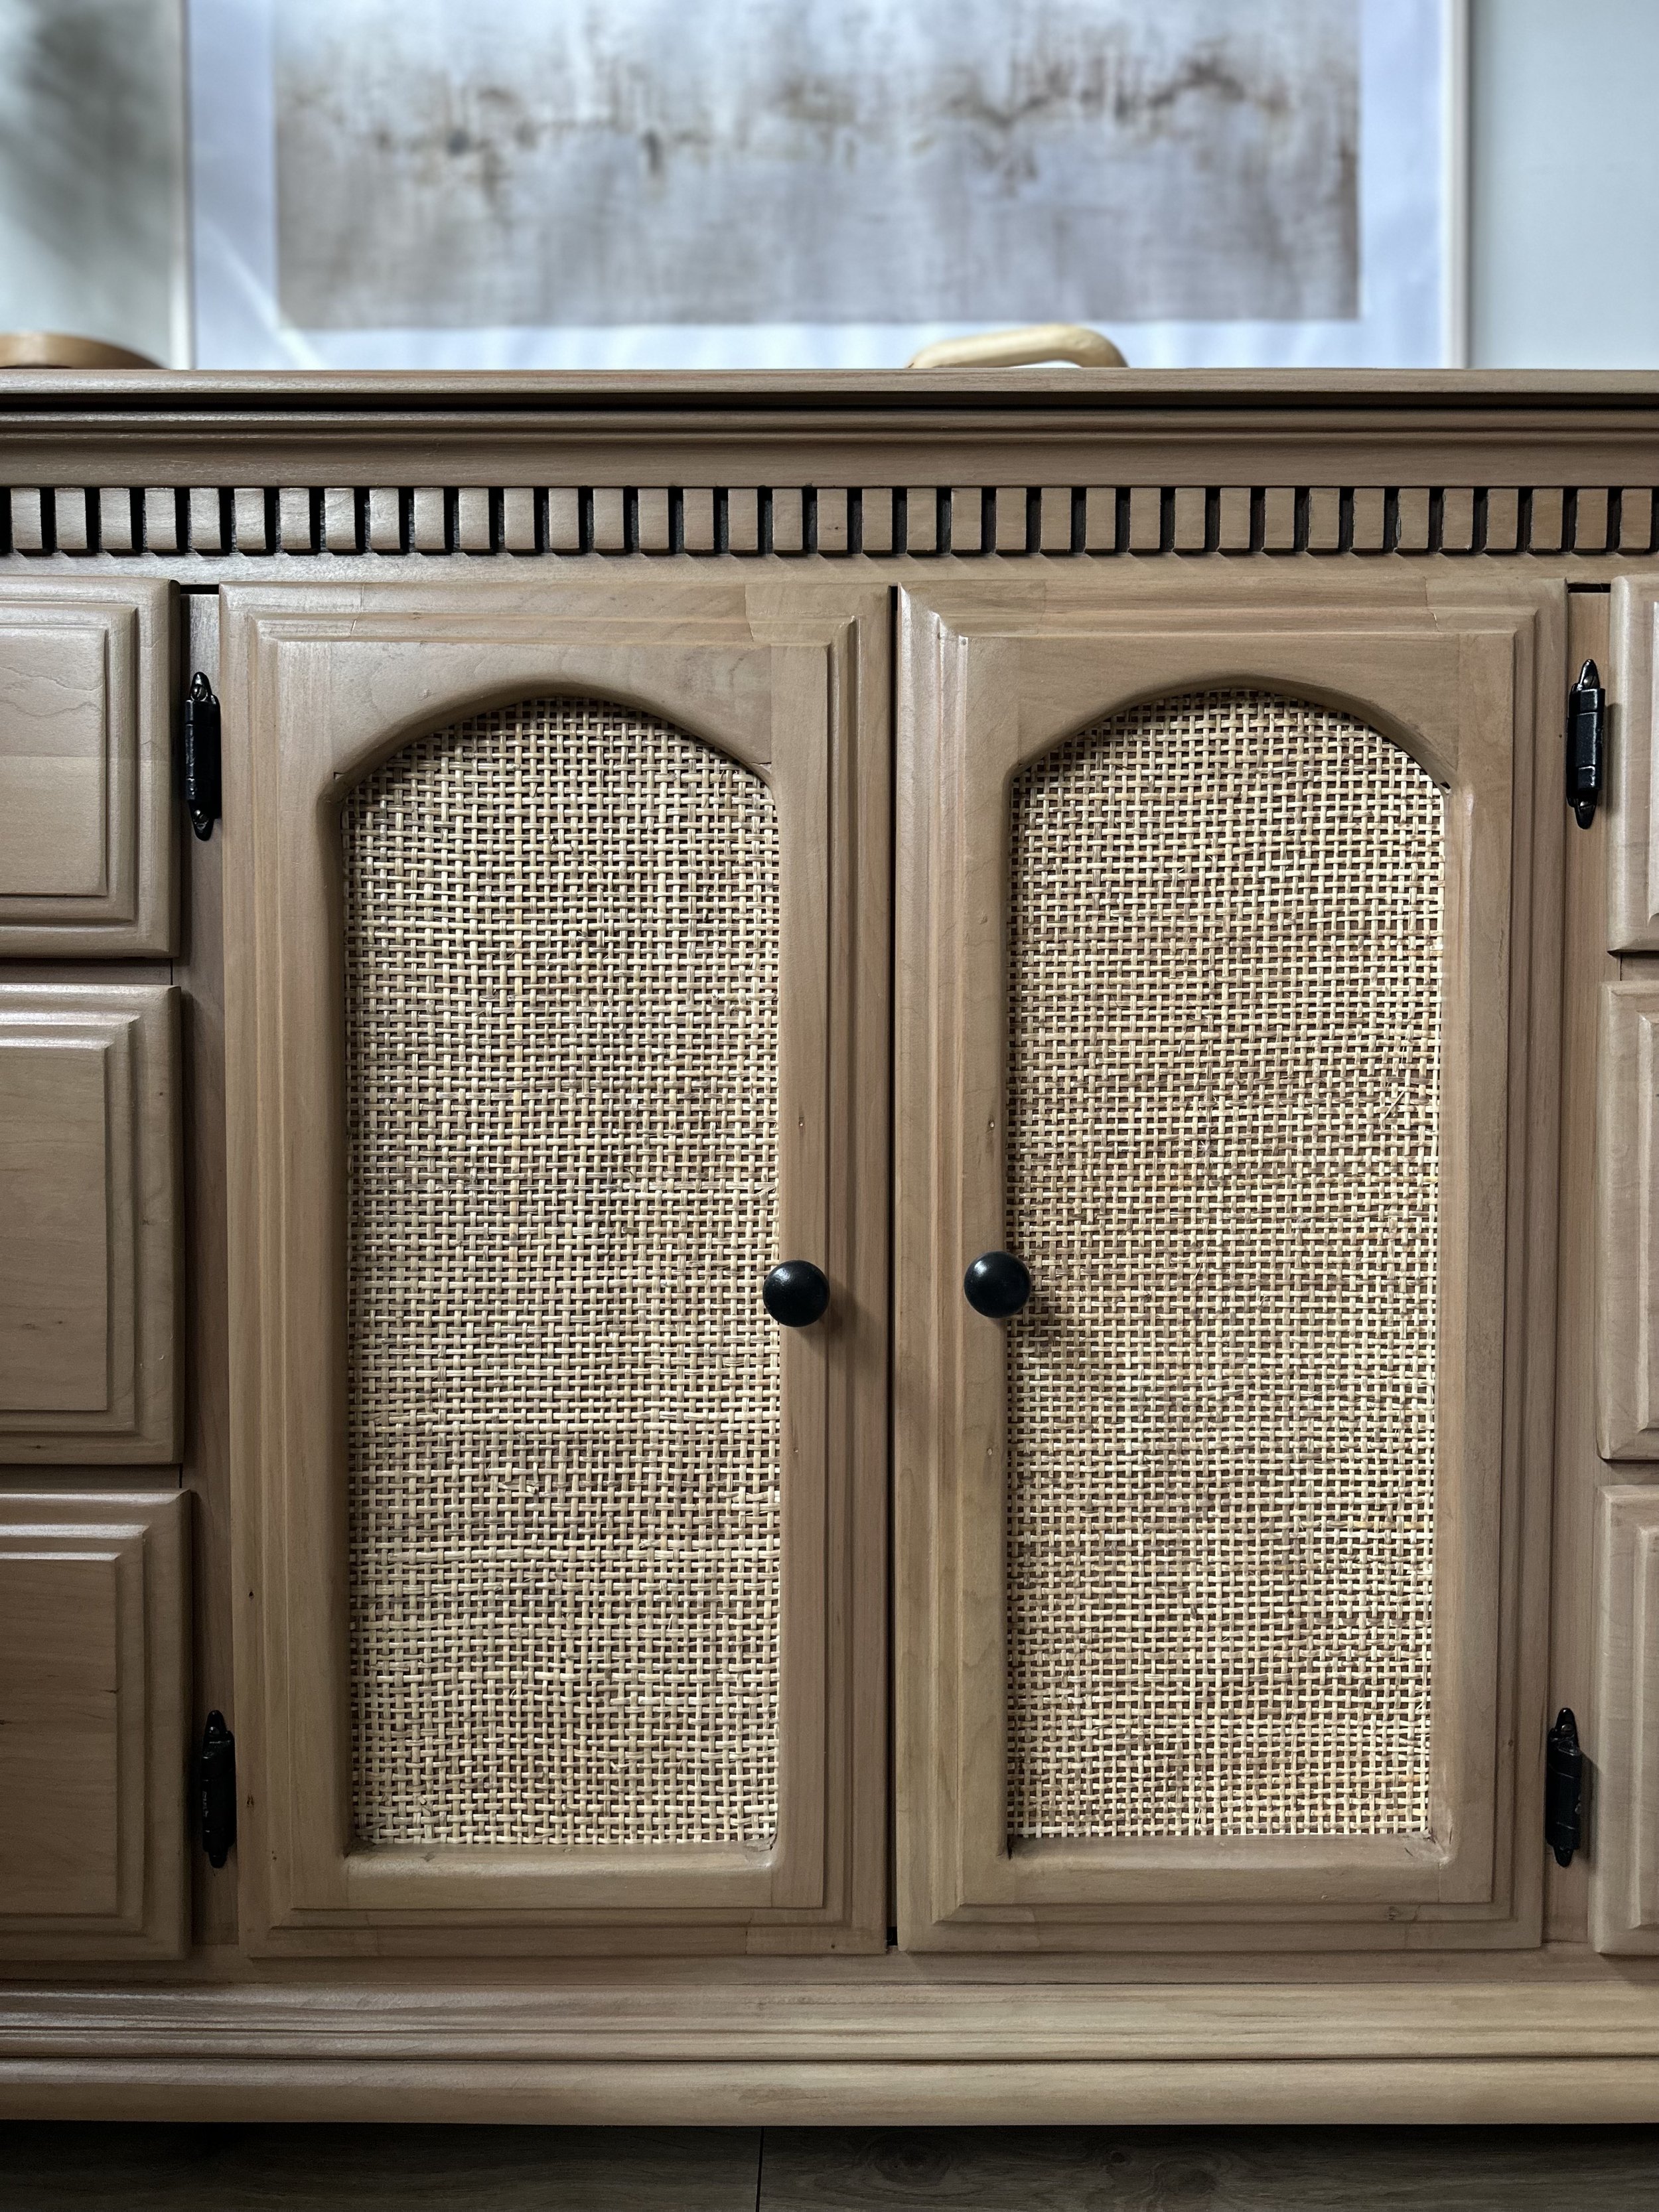
When I saw this dresser I immediately knew that I wanted to turn the doors into arches. I originally thought I would just paint the dresser but decided against it once I attempted to pick up the dresser. It was honestly the heaviest dresser I have ever lifted, so I knew that there had to be a lot of beautiful solid wood under the dark and dated finish.
Carbide scraper
I first grabbed my carbide scraper but the top was too thick. The finish just wasn’t coming off easily so I reached for my orbital sander and sanded with 80 grit sandpaper. Afterwards, I sanded with 120, 180, and then 220 for the top. The rest of the body, I just used 80, 120, and then 180; deciding to skip the 220 because honestly, I was just so tired of sanding.
I often get asked why I chose to sand instead of stripping. Below is an overview of the two ways to remove a finish. My preference is sanding because I loathe the messiness of chemical strippers that I avoid them at all cost. This is just a personal preference though!
Below is a full video on all the details of how I got this look.
When to use a chemical stripper and when to sand?
Chemical stripper: There are 2 reasons I choose to use a chemical stripper over sanding:
Veneer: Veneer is a very thin sheet of wood and very vulnerable to damage if it is overhanded which is why using a chemical stripper can avoid any damage to the veneer. If you are planning to stain or keep the natural veneer in your design, then I would suggest using a chemical stripper first.
Detailed areas: If you have incredibly detailed areas, chemical stripping can make the process of removing finish a lot easier. In looking at this dresser, I should have used a chemical stripper for the dental molding on the front. However, I decided to leave the natural dark stain in between because it would tie in the new black hardware that I planned to add.
Sanding: I almost always choose sanding, just because it tends to be less messy and “easier” than using a chemical stripper. If you have solid wood, I would highly suggest sanding instead of using a chemical stripper. And if you have the right sander, it will help remove the finish fast and easy!
Here is the extensive list of all the products used for this project. It seems overwhelming, but that is because I put EVERYTHING in it (including a work bench).
Please note that if you purchase something from these links, I make a small commission at no extra cost to you. Thank you for supporting my small business!
Surf Prep 3x4 Electric Ray Sander | Save 10% by using code ADASH10
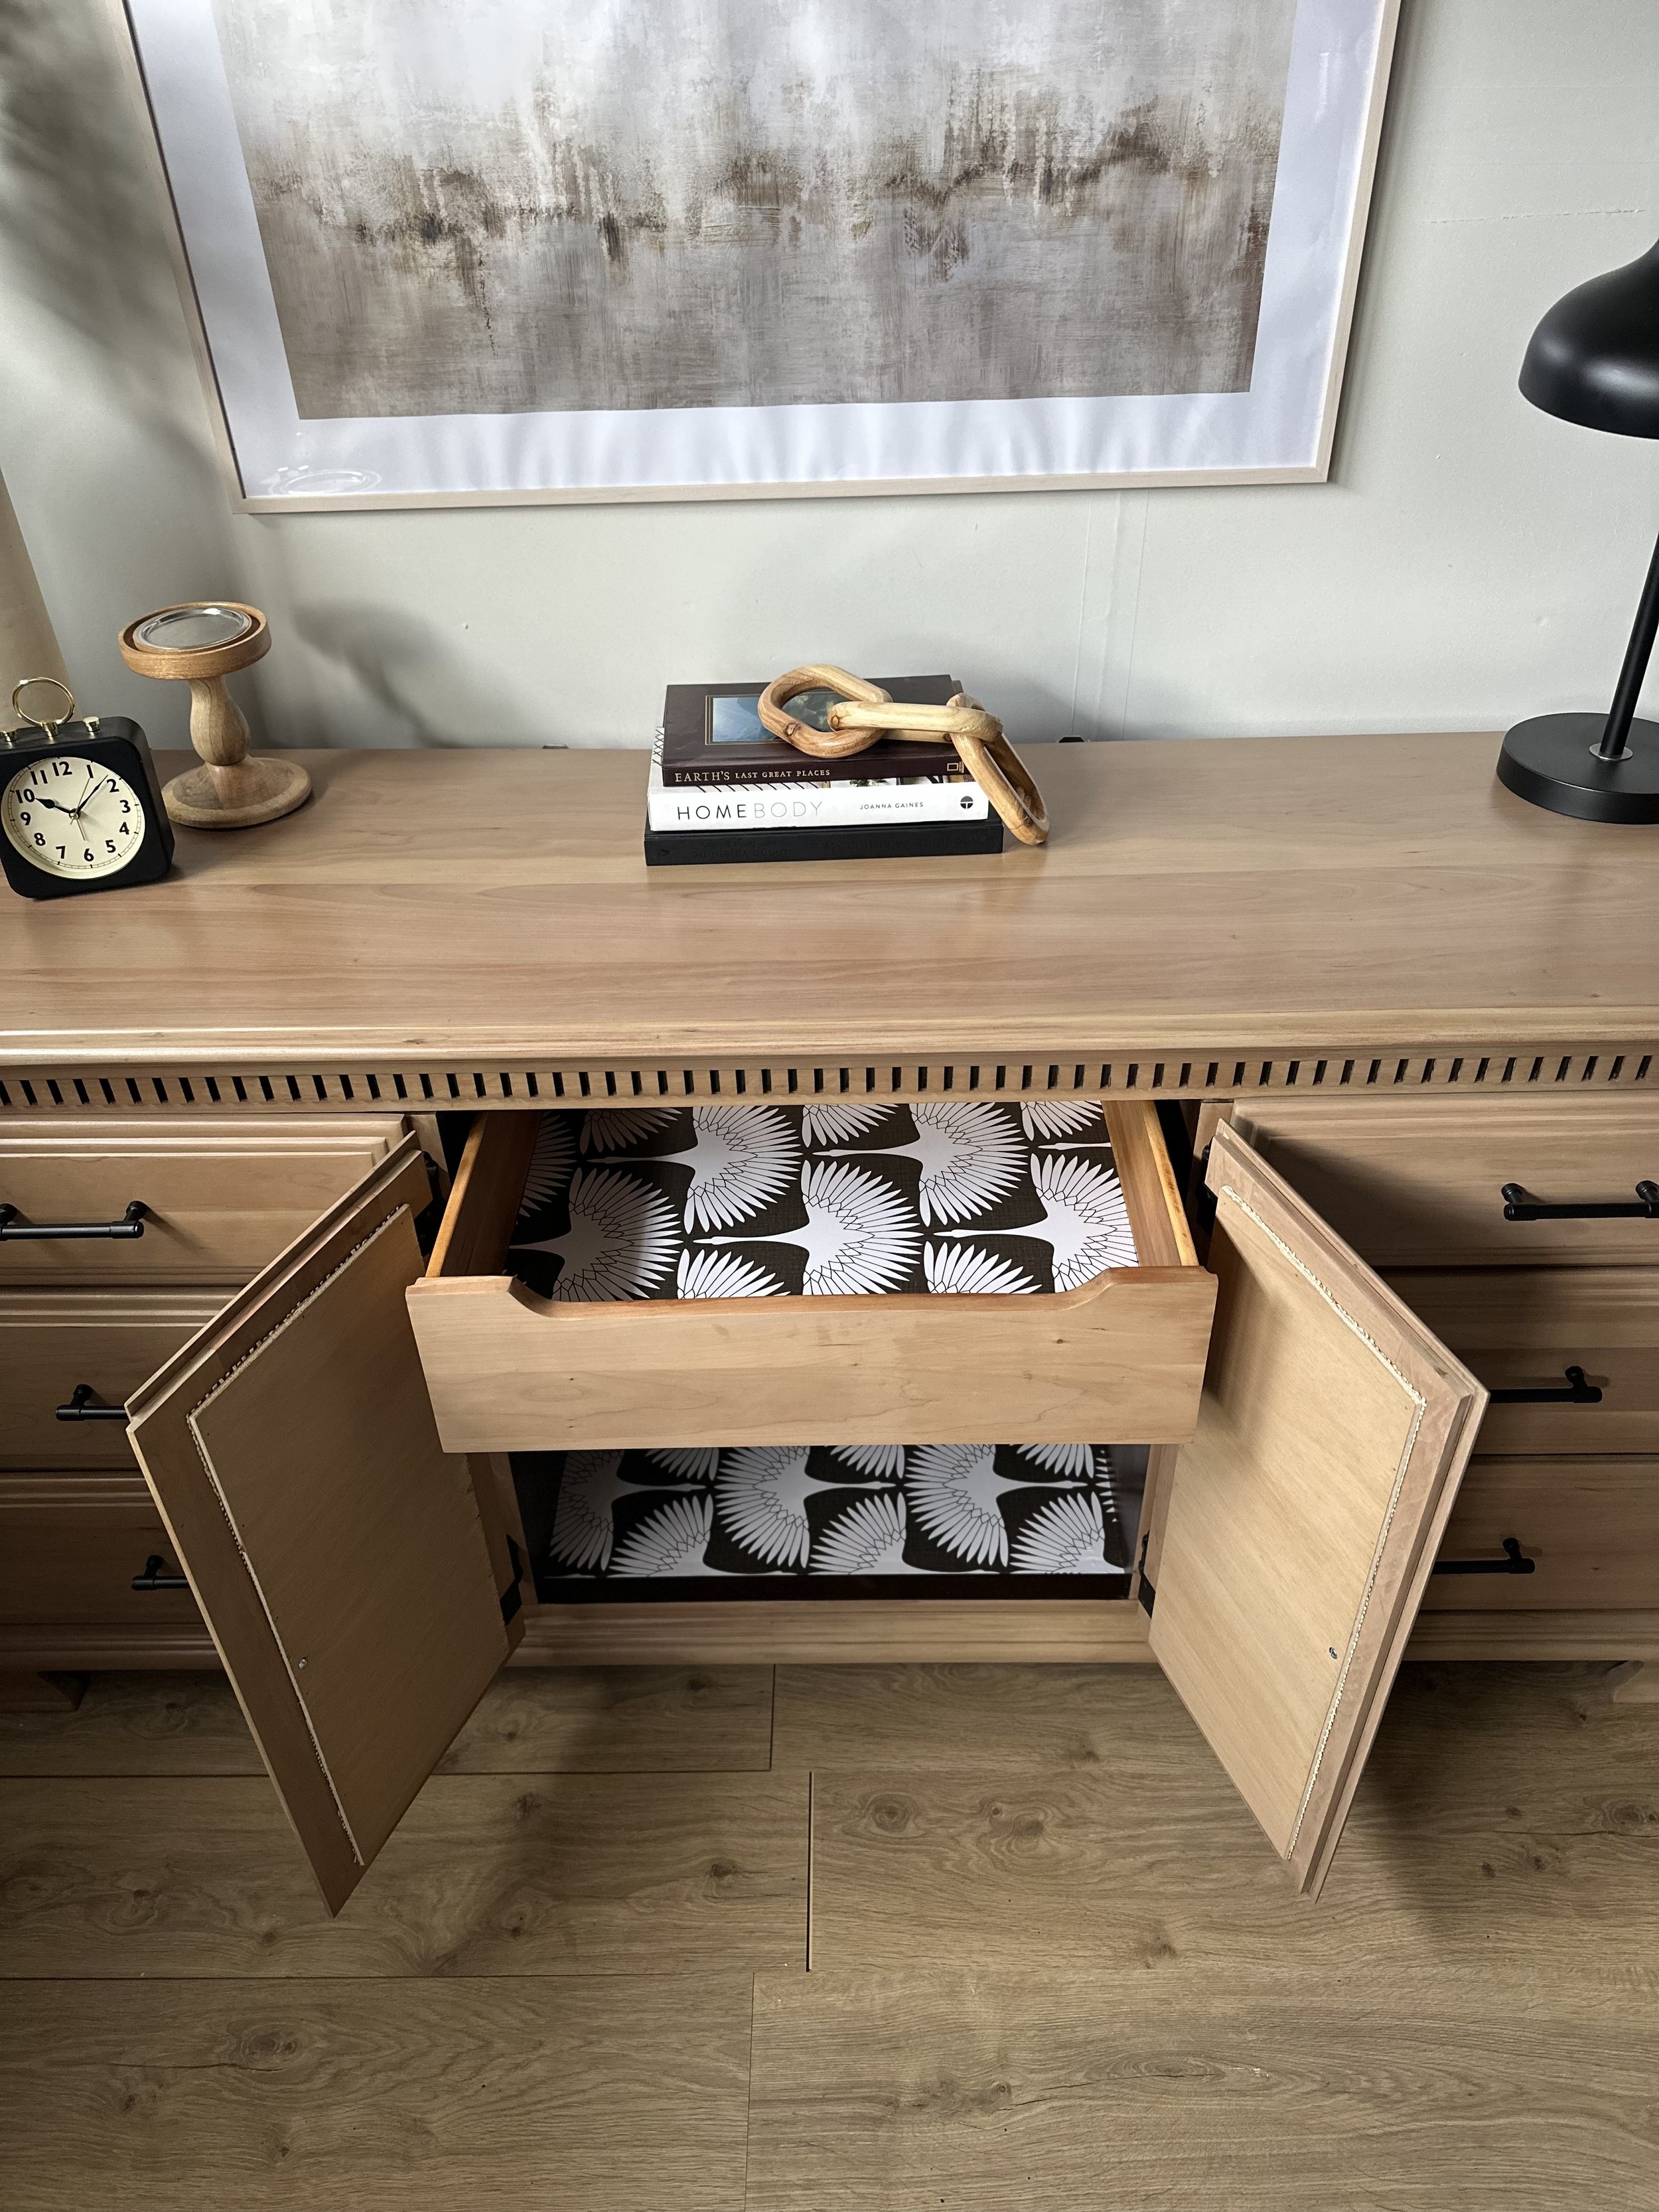
I still can’t believe that this is the same dresser! I don’t usually pat my own back (although you should always take the time to celebrate your wins and something I am trying to do more of!), but I find myself staring at this dresser in awe. It’s one of my most favorite makeovers I have ever done!