DIY Indoor Herb Shelf
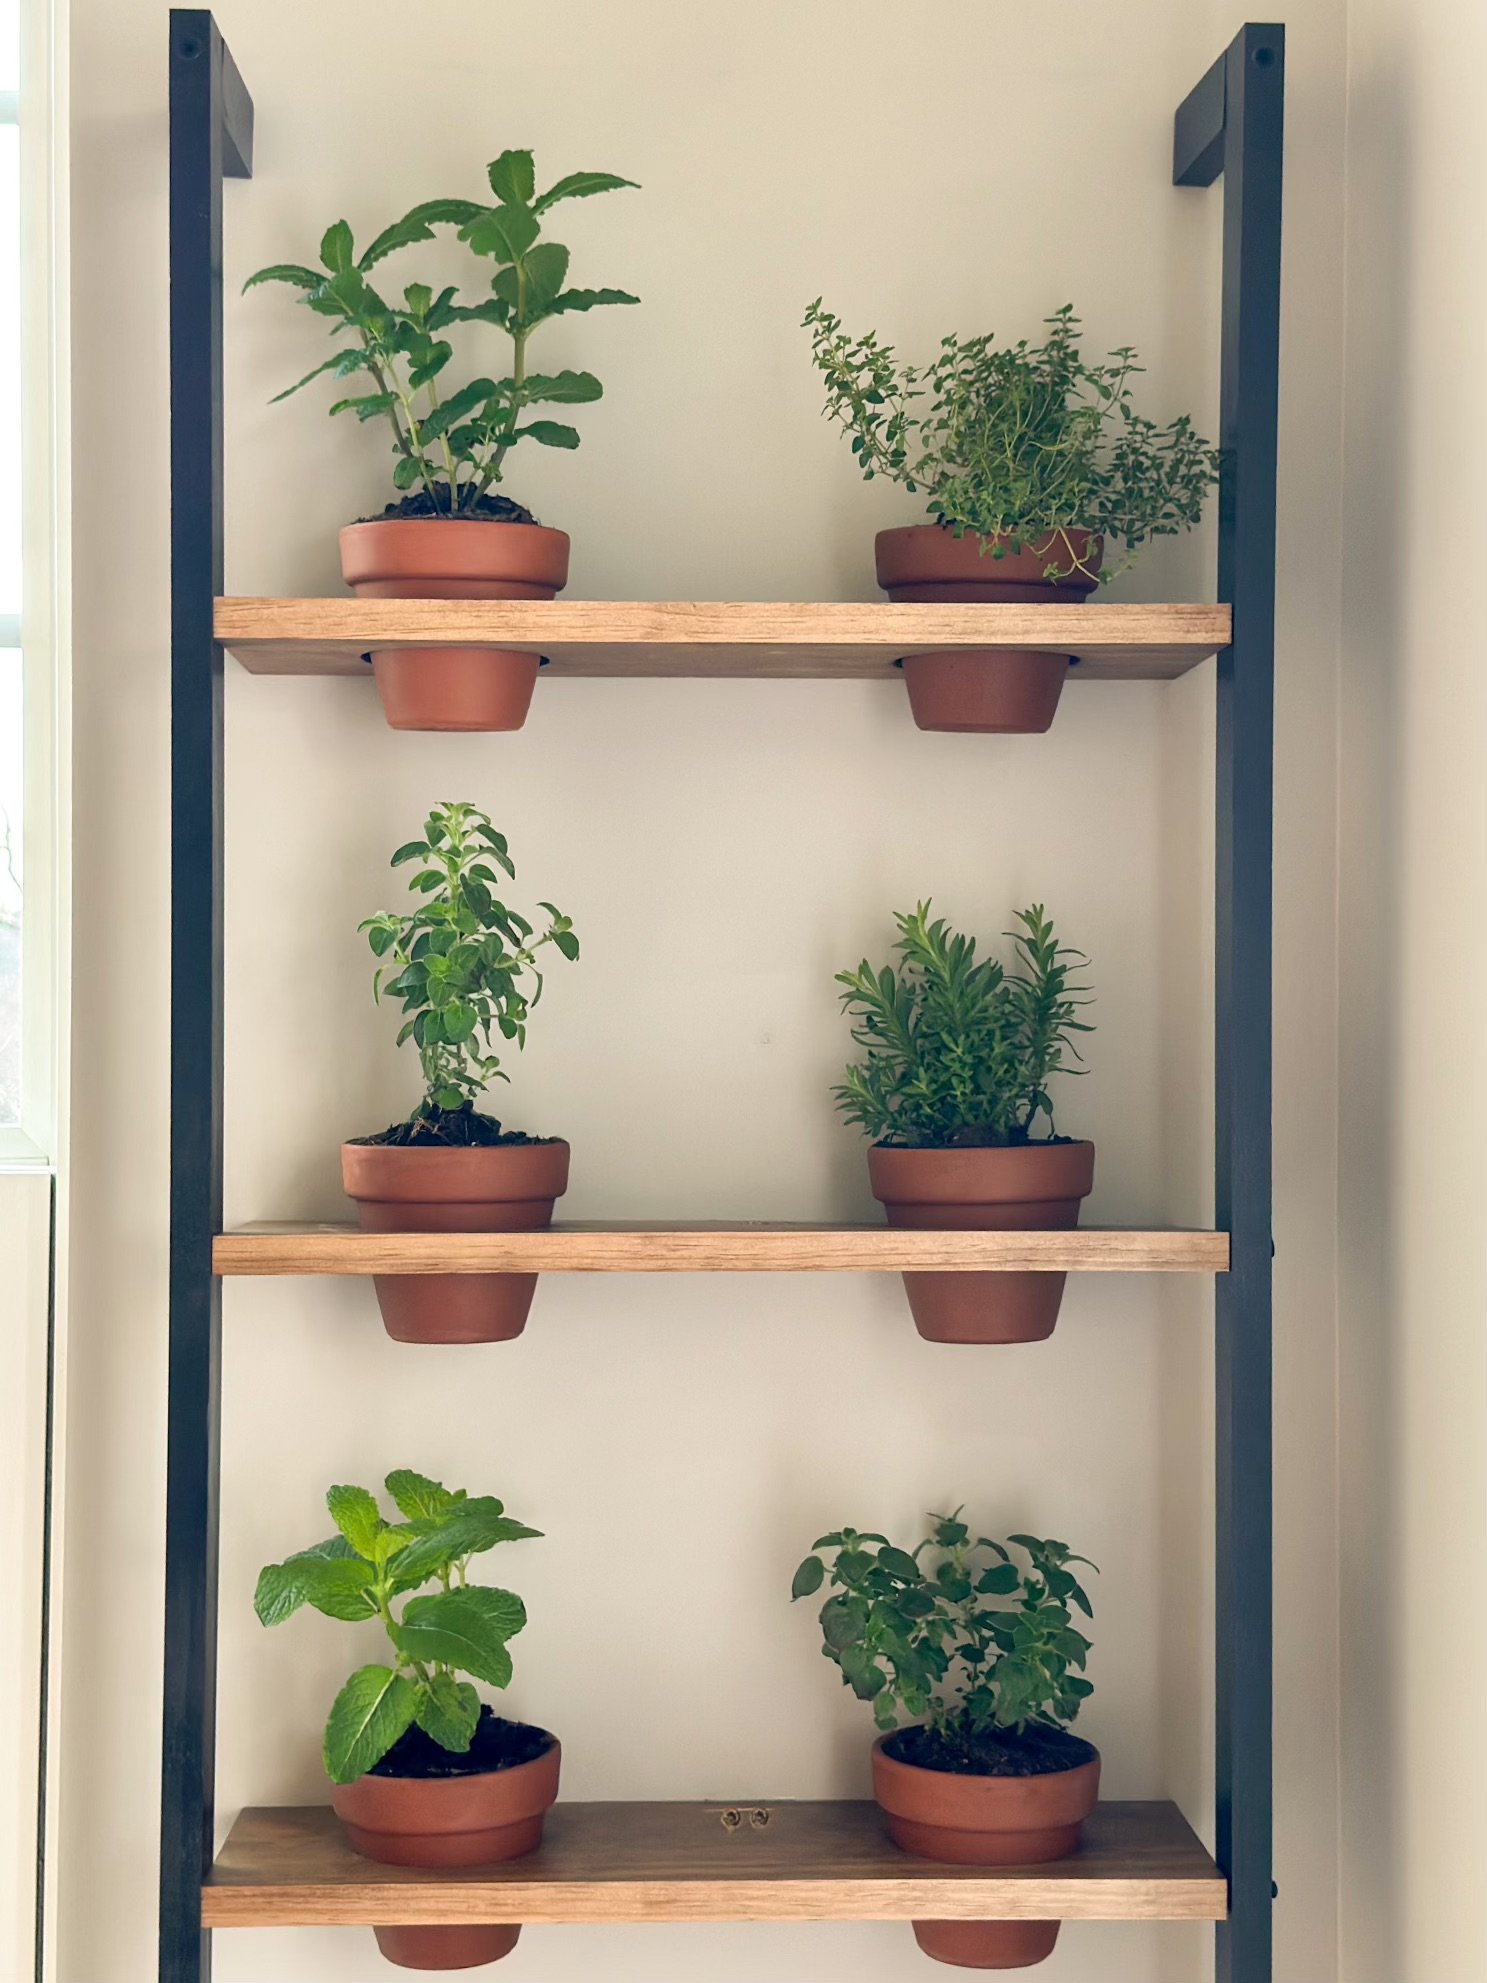
This project was so easy because it only took a few cuts, paint and stain to make it come to life!
Materials Used:
Tools Used:
Hole Saw (for cutting holes in wood for pots)
Step 1: Cut Boards to Size
I used 1x2” Select Pine for the black part of the shelf and cut it to the height of the shelf I wanted. Mine ended up being around 48” in height. Below is a cut list that I used for this project if you want to make the exact version of mine.
I used a miter saw to make the cuts.
Cut list:
(Qty 4) 1x2x4” - These are for the horizontal pieces that connect to the black vertical pieces
(Qty 2) 1x2x48”
(Qty 3) 1x5.5x19”
Step 2: Cut holes in Shelf for Pots
I used a hole saw that attaches to your drill to make these cuts. I measured to the center of the board, and then marked the middle of each side as I had 2 pots going on each shelf.
Using hole saw to cut circles in wood for pots
Step 3: Stain and Paint Boards
For the shelves - I used an Early American stain after I used a pre-stain conditioner. I used select pine for the shelves, and pine stains very unevenly so I highly recommend using a pre-stain conditioner for a more uniform stain application.
I apply the pre-stain conditioner liberally and let it sit for about 10 minutes before wiping off the excess and applying my stain.
I love applying stain with these staining pads as it makes for a really even stain application. After it dried, I applied a lacquer to ensure the wood was protected for the eventual dirt and water that would get on the shelf.
Staining and Sealing Wood
For the 1x2” pieces, I used a spray paint that had a hammered effect to add to the look of steel that I was going for. I sprayed a total of 3 thin coats.

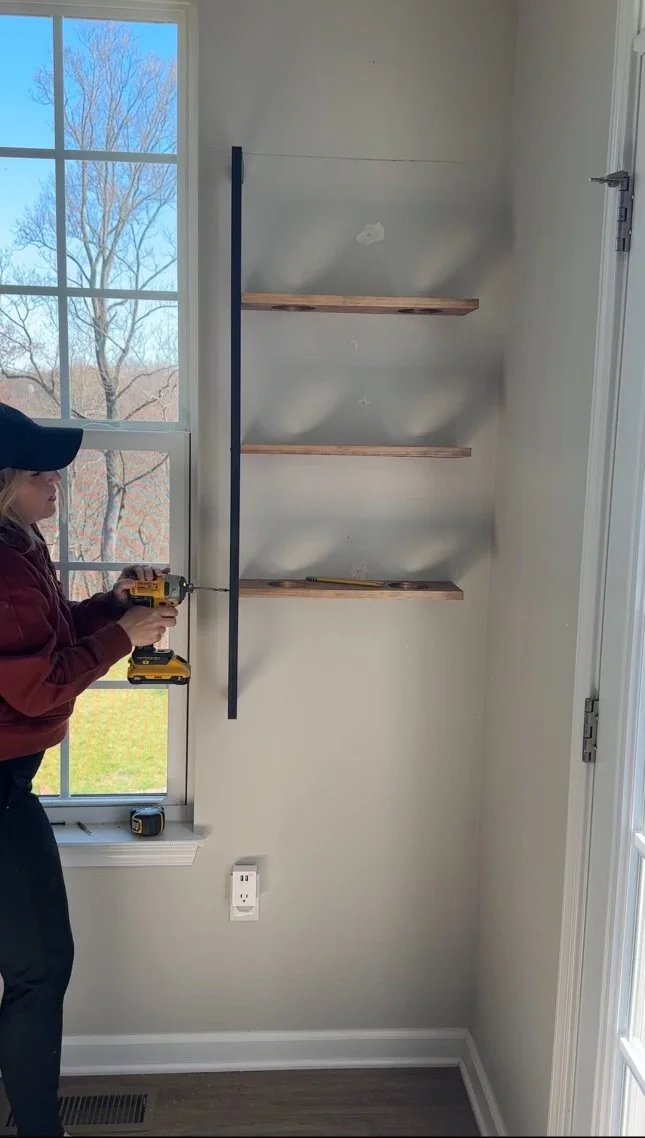
Step 4: Install the Shelves
I wanted these shelves to look like they were floating and being held up by the “steel” braces but I had to be creative with how I installed them because the black wood would only be there for looks and not structure.
I first found where my studs were in the wall, and measured where that would hit on the shelf. I then drilled 2 pocket holes on the shelf using this pocket hole jig. I used 2.5” screws and installed it on the wall into the studs, making sure it was level.
You can plug the pocket holes so you can’t see them, which I plan to eventually do, and even stain them to match the wood on the shelf. Kreg sells pocket hole plugs that fit in perfectly!
I then attached the black brackets to the sides of each shelf using a 1 3/4” screw. I didn’t attach the black wood to the wall itself, just to the shelves.
Step 5: Plant the herbs
I used 4” clay pots and planted in my favorite herbs. It was as easy as that!
