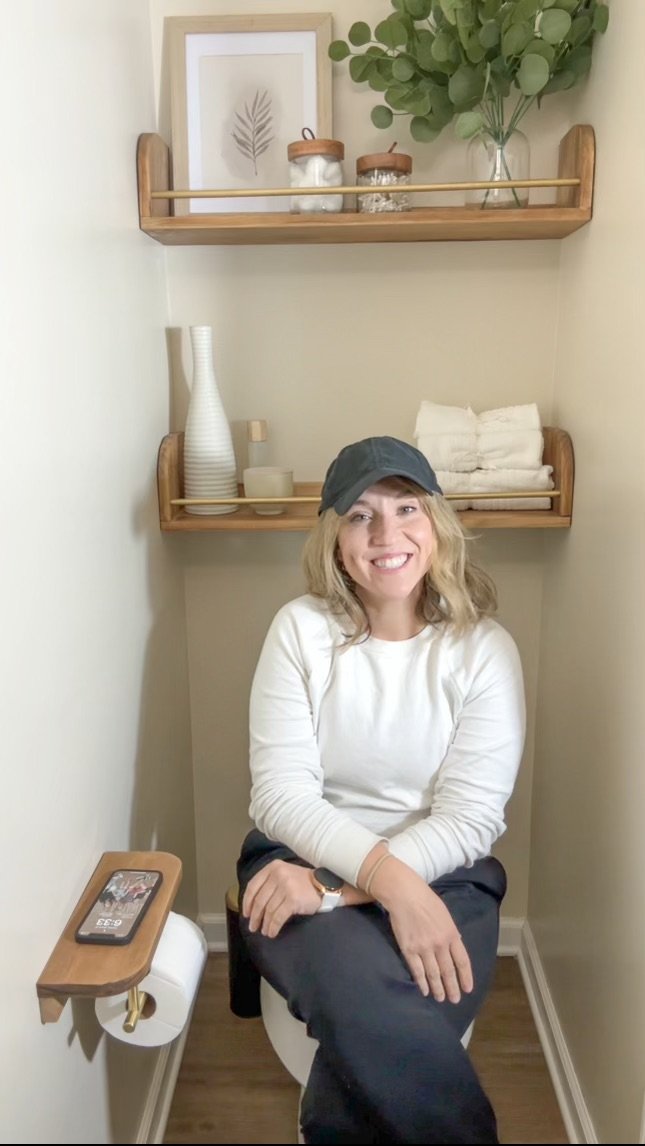
Powder Room Update - Under $500 (Part 2)
These floating shelves were really easy to make! With the help of Lowe’s, here’s how I did it.
Please note: The links below contain affiliate links that allow me to earn a small commission if you purchase something. It’s of no extra cost to you and helps support my small business! Thank you!!
Step 1: Purchase the following material:
Step 2: Cut the boards to size
I used a miter saw to cut the boards to the length of my wall. You can choose however long you want your shelves to be.
I used the same 1”x8” board and cut a 5.5” heigh piece that would be used for the arches on the sides.
I cut the 1”x3” board to the exact same size as the length of the shelf board. This will be the board that you drill into the wall to attach it to the wall.
Step 3: Cut the arch
I used a gallon size paint can to trace on the 5.5” board. This is the arch that you’ll cut out using a jig saw. Just take it nice and slow following the line, and it actually comes out way better than you think it would.
If needed, you can take an orbital sander to smooth out the arch even more! I used 180 grit sandpaper to do mine.
Step 4: Drill holes for dowels
This step is completely optional but I love the look of a dowel connecting the sides of the arches together. It looks like shelf railing to me, but is WAY more affordable at only $2.50 per 4ft long dowel.
I used a 1/2” drill bit and came up 1.5” and over 0.75” from the bottom of the arch. I was careful not to drill all the way through the arch board! You might want to mark your bit with some painters tape to ensure you don’t drill all the way through.
You can then grab your 1/2” dowel, spray paint or stain it in any color you’d like. Cut it to the size of your shelf (plus 1/4” longer) and slide it in once the shelves are installed.
Step 5: Attach pieces together
I used wood glue, brad nails and 2” long wood screws to attach everything together.
First, I attached the 1x3” board to the 1x8” board. I glued it to the top, added a couple brad nails to hold it in place, and then added 3 screws to secure it in place.
Then, I attached the arches. I put one on each side, and glued to the top of the 1x8” board. I used brad nails to secure this and hold while it dried.
Step 6: Stain & Seal Boards
I used a pre-stain conditioner before staining it in special walnut. I actually wish I would have went a little darker but still loved how it turned out.
I sealed in a laquer spray that I haven’t ever used before, and LOVED it. I used 3 thin coats and it dried so fast….30 minutes! Highly recommend if you are looking for a quick and easy way to seal your wood pieces.
Step 7: Attach the Shelf to the Wall
I found the studs, and used a 2.5” screw to drill into. You will want to use the 1x3” board to drill into so that it stays relatively hidden once your shelves are full of all your favorite things!
Steps for the toilet paper holder shelf
Step 1: Cut 1x6” board to 11” in length using a miter saw
Step 2: Cut a 1x3” board to 11” in length
Step 3: Attach the 1x3” to the 1x6” board using wood glue and screws
Step 4: Attach a toilet paper holder on the bottom side of the shelf
Step 5: Attach to the wall


