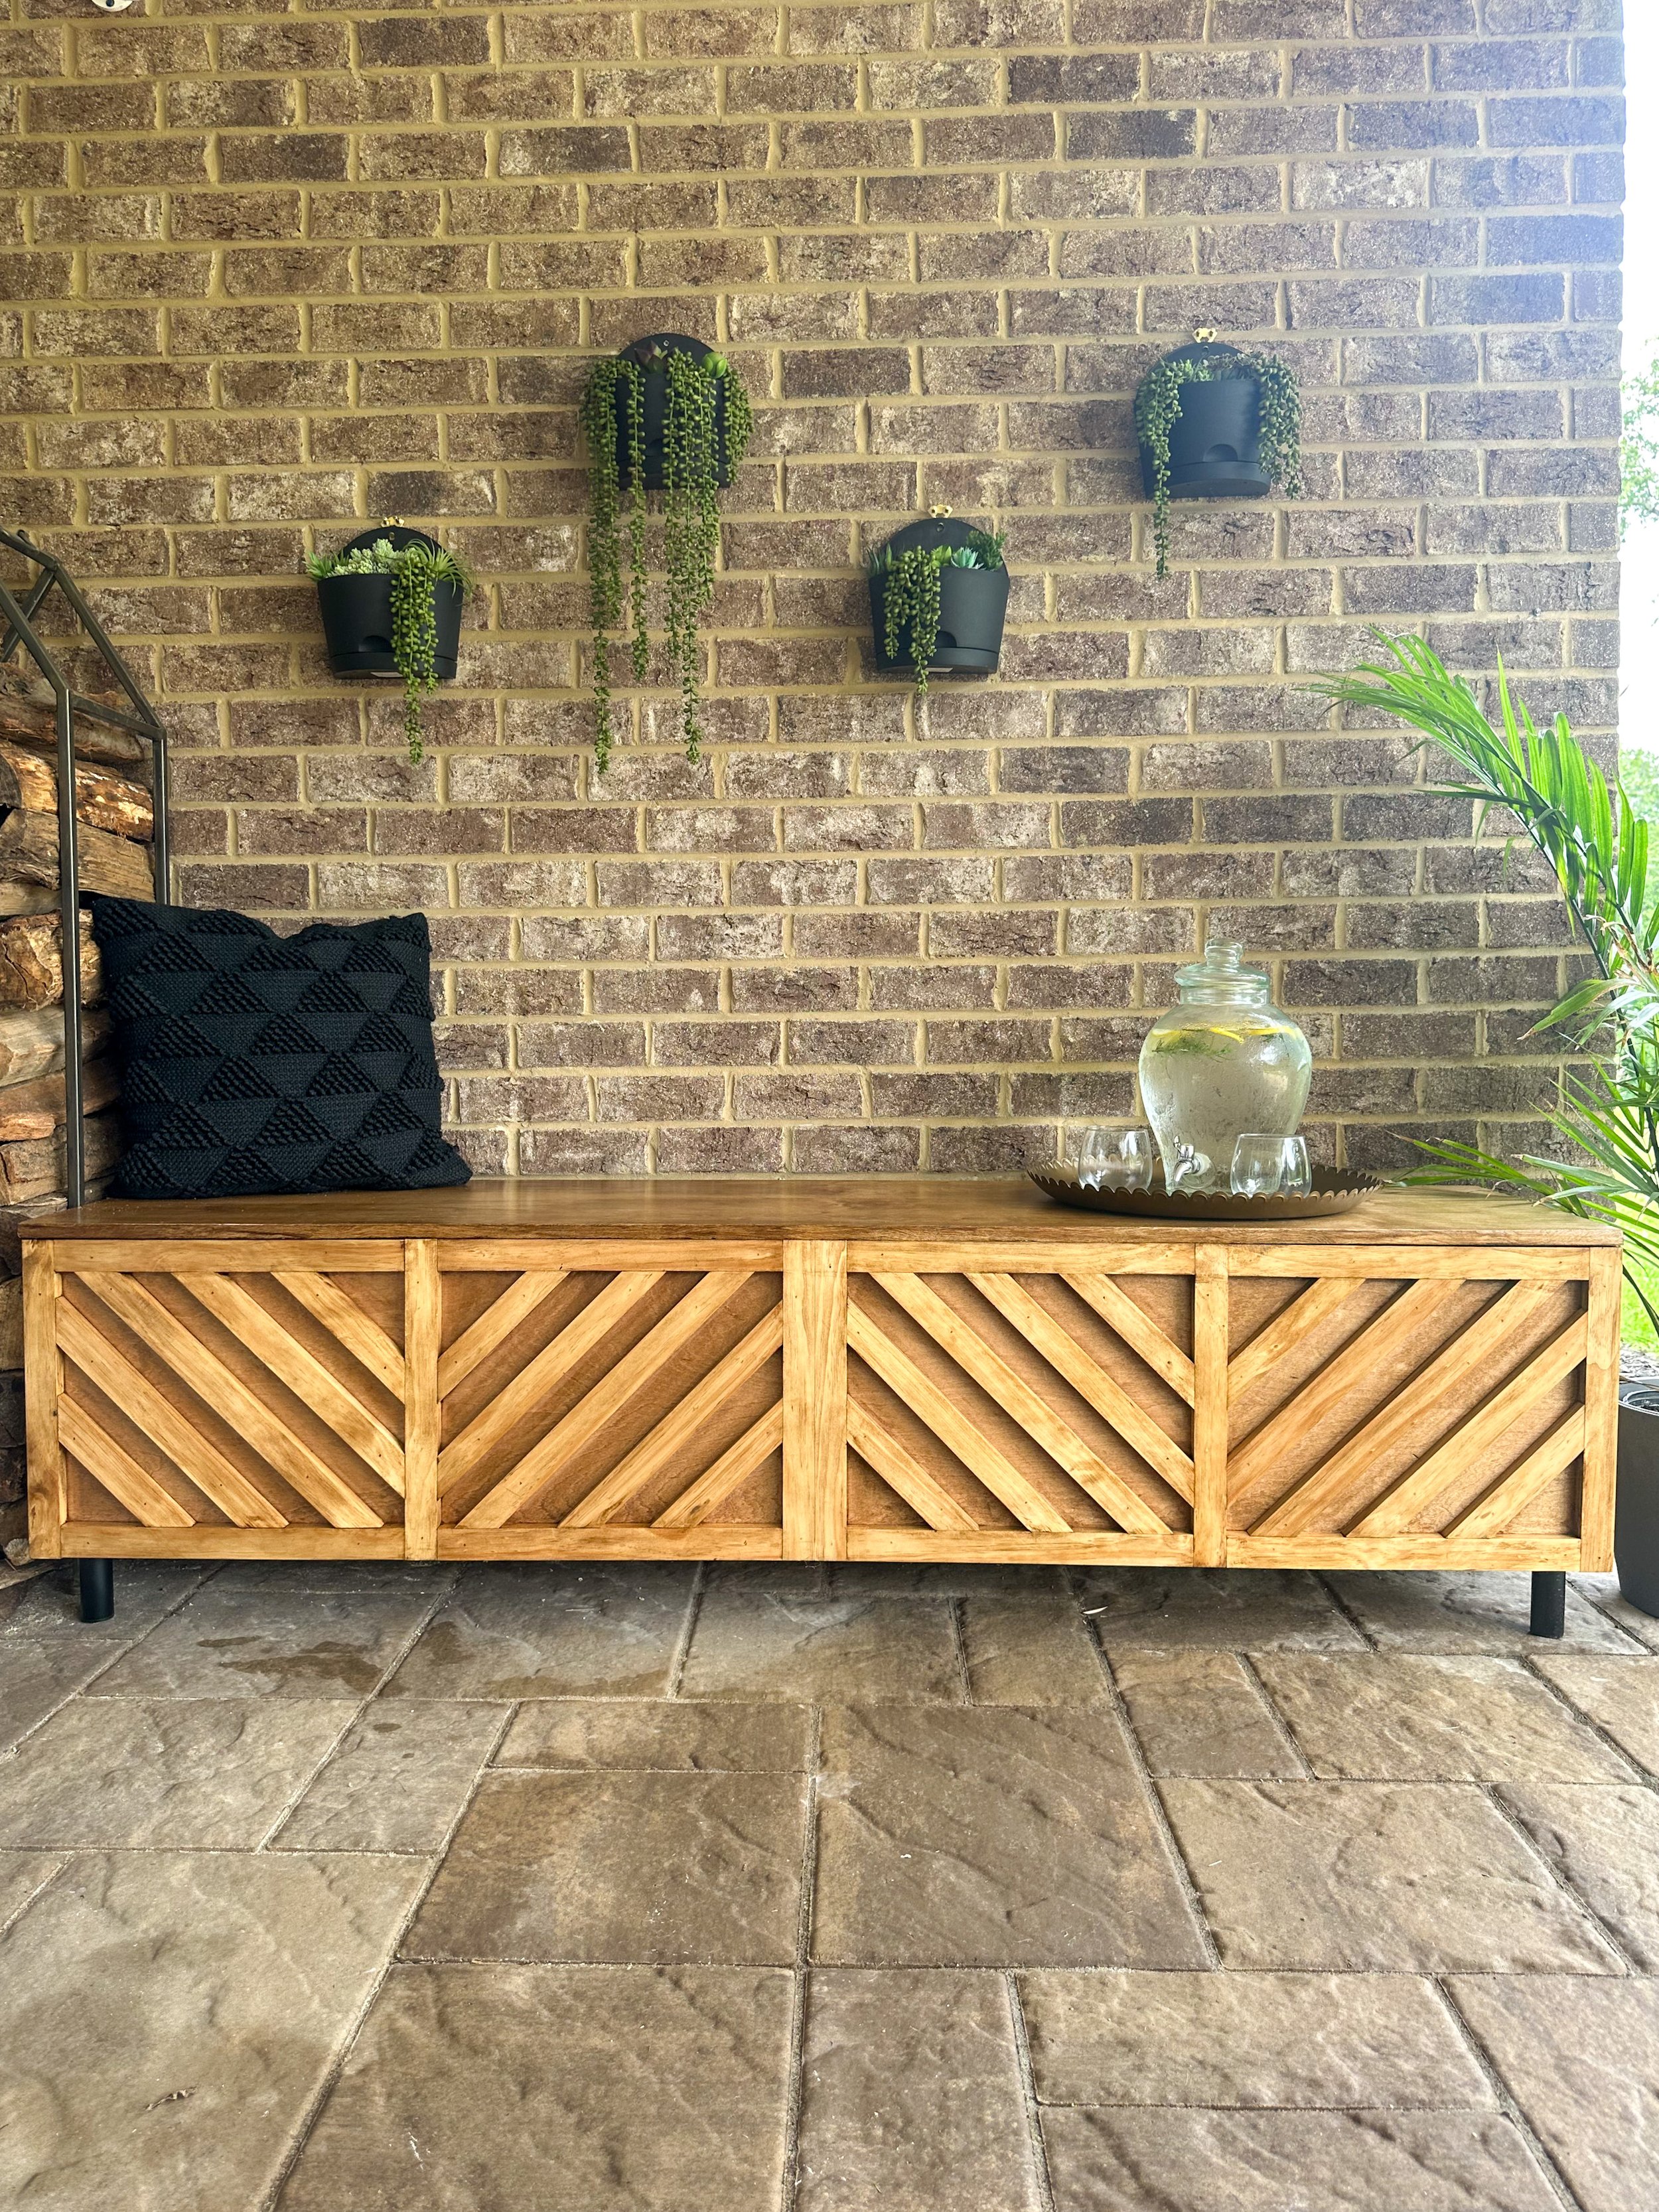
DIY Storage Bench
I am going to attempt to make this post super short, sweet and simple (which can be a little hard when I am so excited about a project)! This bench idea came to me as I was sitting under our deck drinking coffee one morning and kept looking at this space (picture shown below).

Key Concerns with the space
The space is off from our seating area and I really needed more storage for all of my kids’ toys, sunscreen, fire starter, bug spray and just all of the general summer items that are handy to store outside. But the small cabinet was too small and there was so much wasted space on the wall that I kept thinking that I needed something else.
ENTER: The bench idea.
Here are all the materials I used to create the outdoor bench:
Tools Used:
Step 1: Cut Plywood to Size
The picture above gives the dimensions for the bench. I made this custom to fit exactly in the size I needed for the wall, which meant that it was VERY long. Note: This could also make a great TV console too.
To cut plywood, I use the BEST tool (in my opinion). It’s roughly $40 and it cuts plywood perfectly, and so much easier than a table saw. To use it, first, you'll need to attach your circular saw to the guide. The guide has adjustable arms that can accommodate different saw sizes. Once your saw is attached, you can set the desired width of your cut by adjusting the guide's measuring scale. This will ensure that your cuts are precise and consistent. Finally, you'll need to position the guide on your workpiece, aligning the edge of the guide with your cut line. Make sure the guide is securely in place before starting your cut.
Cutting plywood with Kreg Rip Cut Guide
My bench was built completely custom to the space I needed, so they aren’t "easy” sizes. However, I have had a ton of requests to give my measurements so here they are! Please note: I would highly encourage you to measure and cut your own pieces to ensure it all fits perfectly for you.
Step 2: Drill Pocket Holes
Pocket holes are a type of joinery technique used in woodworking. They involve drilling a hole at an angle into one piece of wood, and then joining it to another piece of wood with a screw. This creates a strong and secure connection between the two pieces.
For this bench, I made pocket holes roughly every 8-12 inches and made a pair at a time. The pocket holes are made on the outside of the “box” as this creates a stronger joint. This does require you to purchase the pocket hole fillers, but they are very easy to add with some wood glue which then covers the holes. For a very quick tutorial on this, check it out here.

Pocket Hole Layout
A quick diagram of where I placed all of the pocket holes on each board.
Step 3: Attach Boards
For this step, I just used some wood glue and Kreg pocket hole screws. It’s really important to ensure the two boards are flush with one another, so I used this corner clamp to help keep the boards together while screwing them together.
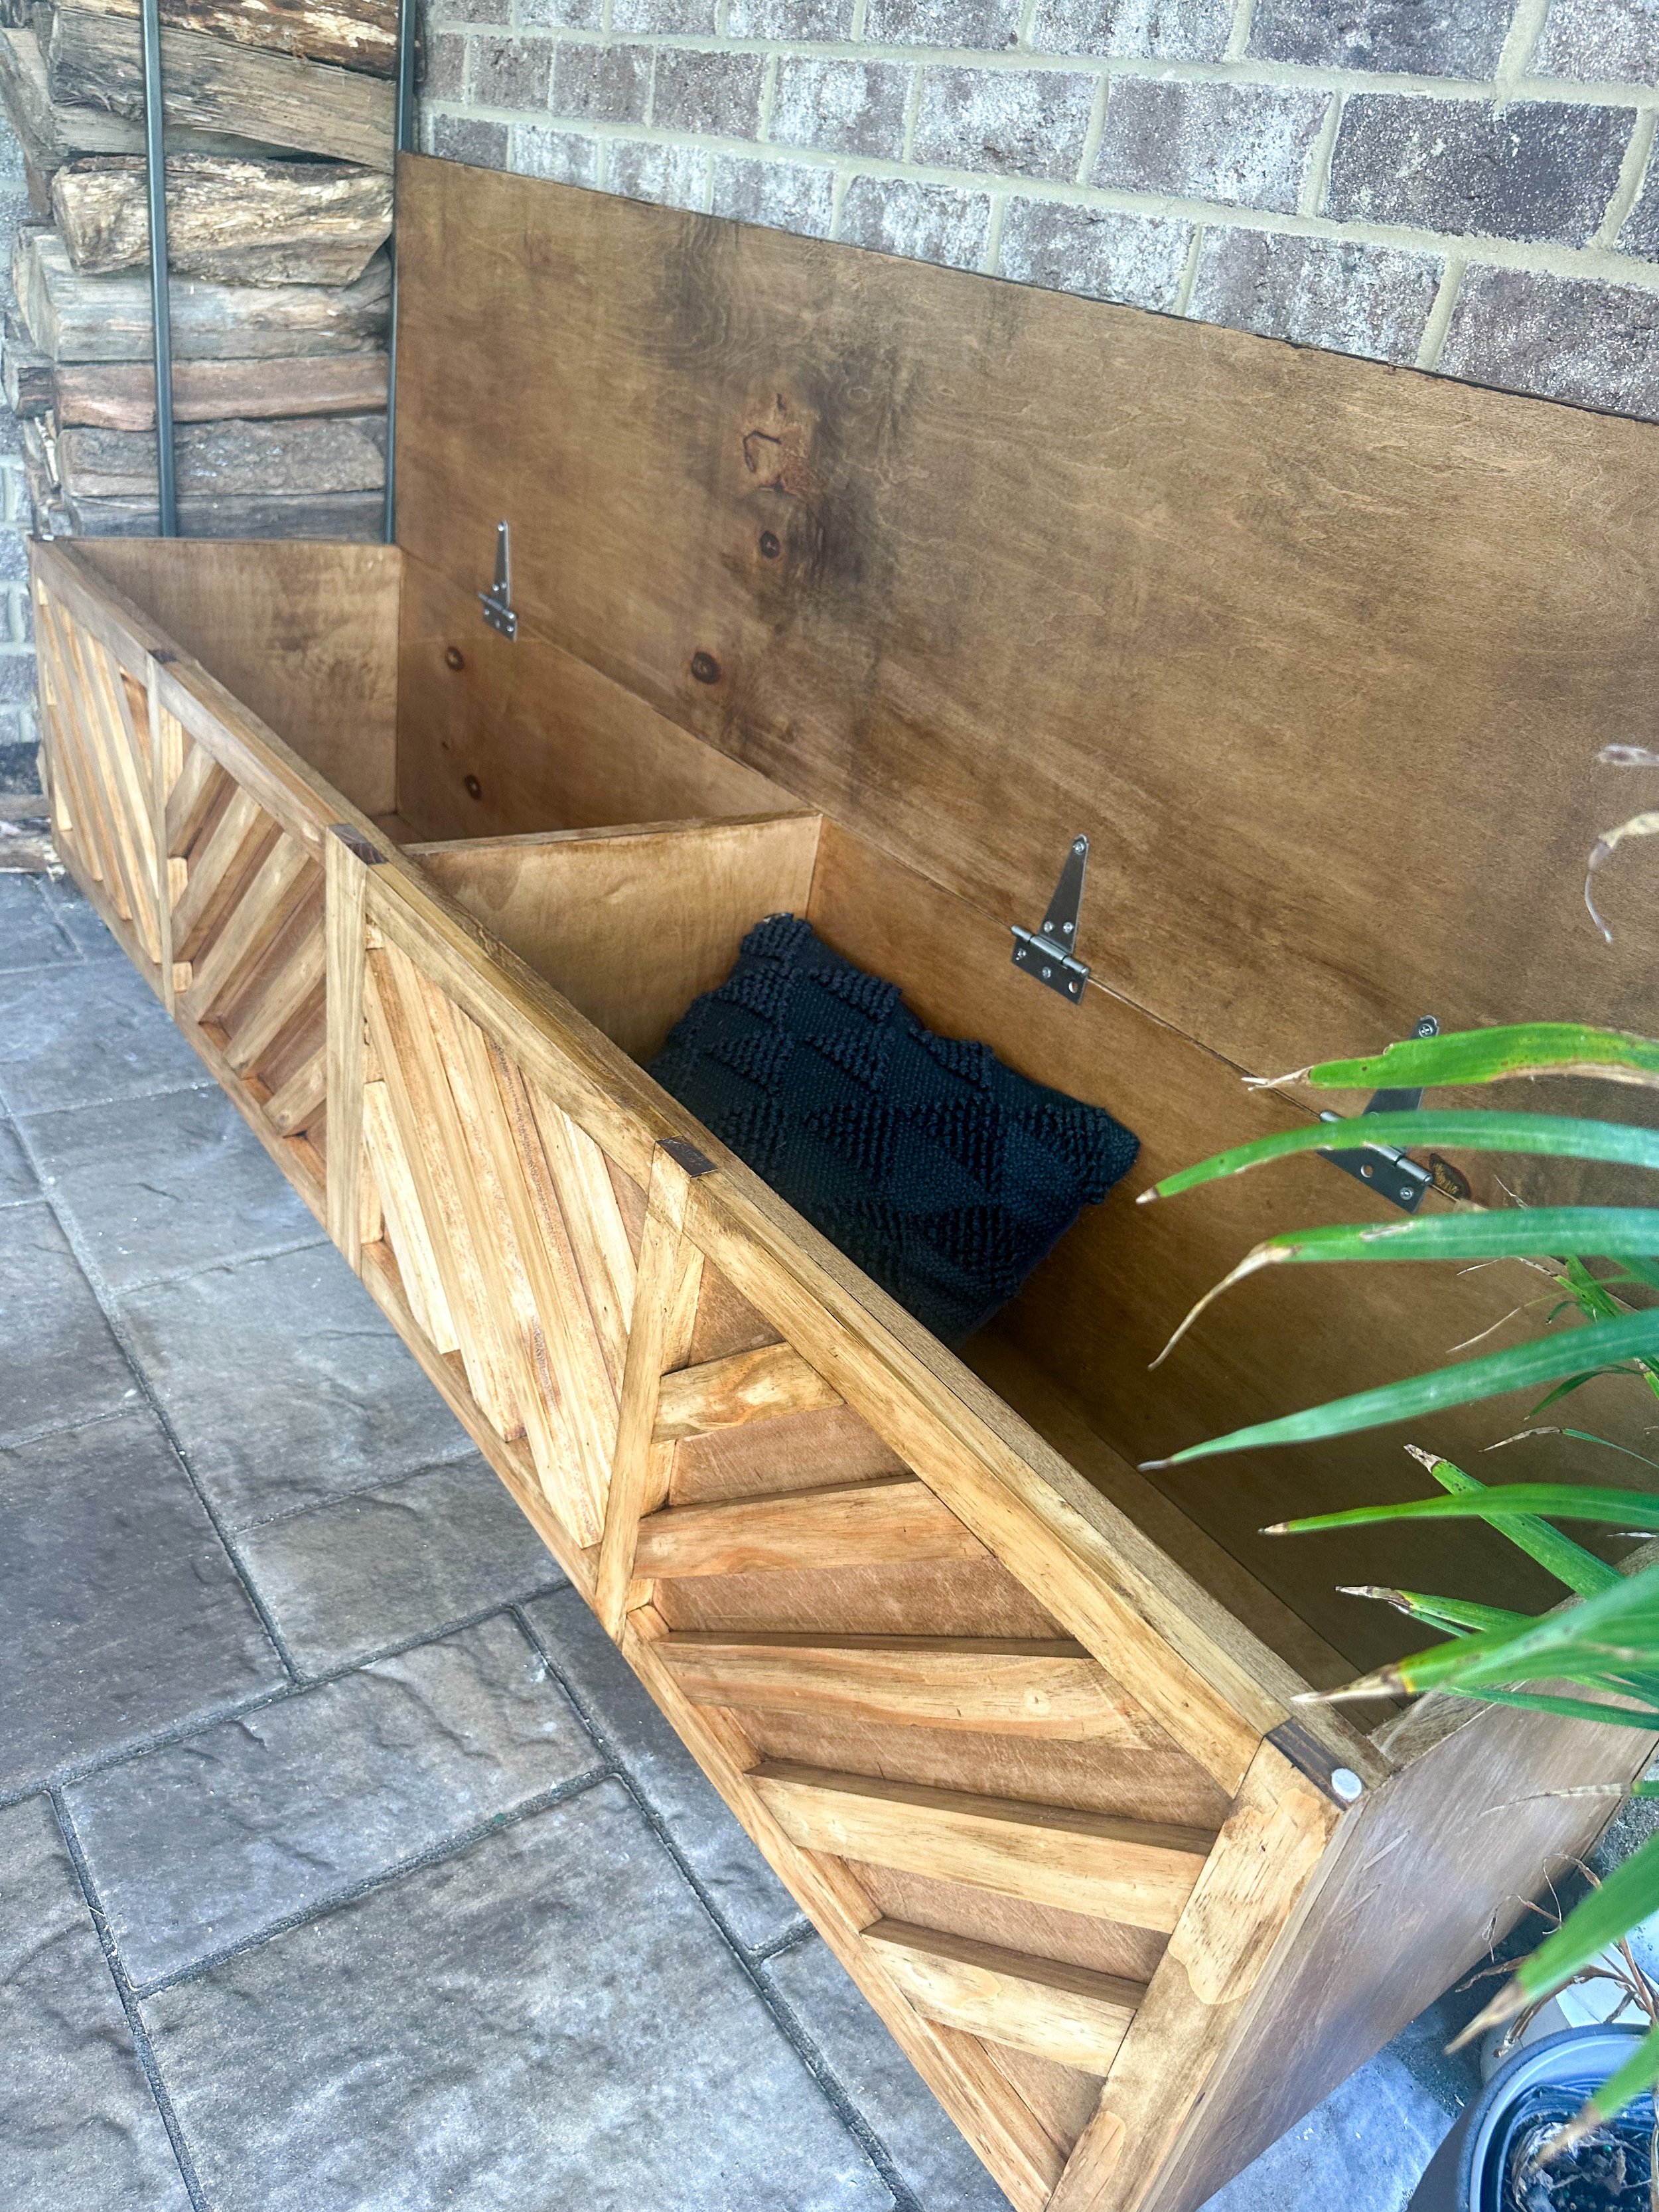
At this point in the build, you will have a square box that really looks like a coffin. I also decided to add in a divider right in the middle inside. I’m not sure if this is necessary, but I was a little nervous that the top would ‘sag’ if it didn't have additional support in the middle. I attached this using some more pocket holes and wood glue.
Note: Don’t attach the top to the bench just yet as it will make it harder when you go to stain it.

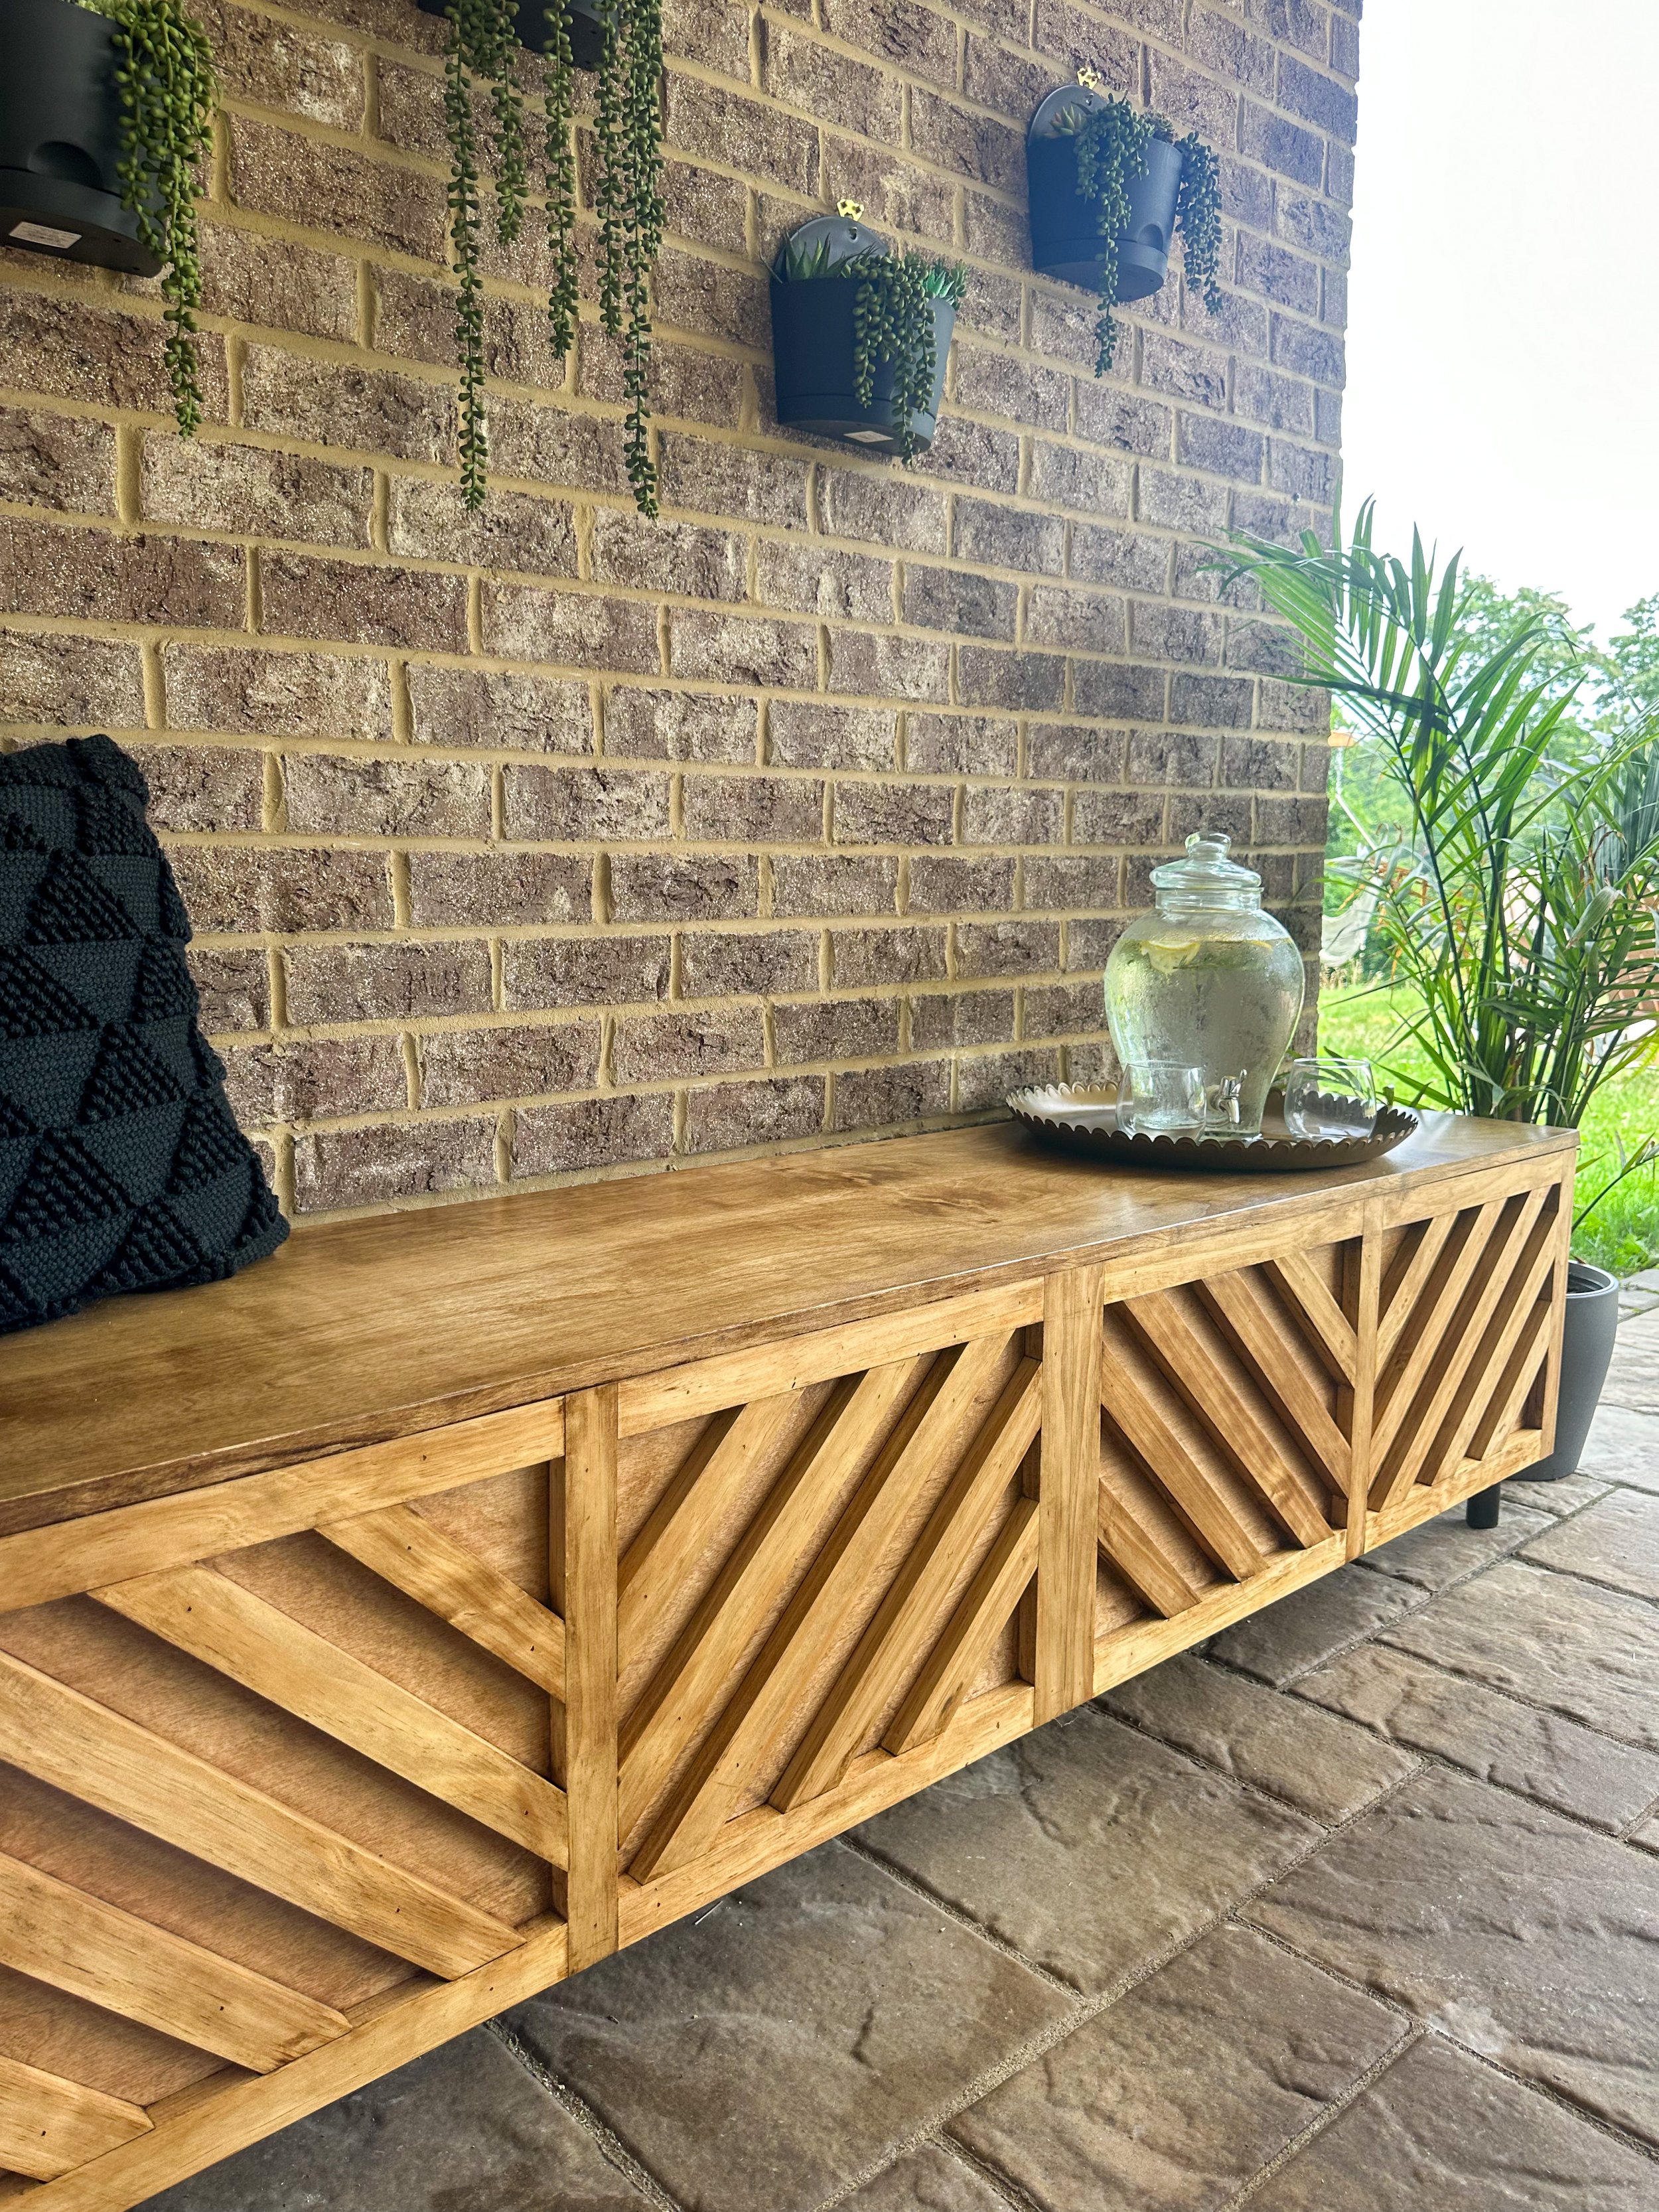
Step 4: Attach Chevron Trim Pattern
I knew I wanted this bench to have some fun detail, and came up with a version of the chevron pattern. I like to layout the design on the boards before cutting, to ensure I like the look of it. For this, I just used some green painter’s tape.
From there, I cut the ends, middle and top pieces first. I measure and cut each of these to size because you’ll find that each one is maybe 1/32nd of an inch off. For this design, I put two straight pieces in the middle of the bench. I then attached using wood glue and brad nails.
Here is a quick breakdown and view of the sizes and where they get installed.
To cut the angled pieces of the chevron pattern, it was pretty simple once the sizing was done on one section. From there, the other 3 sections are exactly the same size! Attaching it follows the same steps: wood glue then brad nails.
Step 5: Attach legs & apply veneer edging
I wanted the full modern look to this bench so I bought some black steel 4” legs and attached them to each corner. I ended up adding 1 additional leg to the center, to ensure it was durable when multiple people sat on it. The legs come with the screws that I attached them with. See video below.
When using plywood, it’s an important finishing touch to add veneer edging where you can see the “layers” on the sides of the plywood. This is the edging I use, and it’s really easy to apply.
Measure to size and cut with scissors.
Apply with an iron to heat up and melt the glue. I like to use a J-Roller to apply the pressure needed for the veneer to properly adhere but it’s not necessary. You can take a credit card and apply pressure to ensure an even stick to the wood/veneer.
Step 6: Stain & Seal
It was finally time to stain the bench. Any time when using a soft wood like pine or birch (both of what I used on the bench), it’s important to apply a wood conditioner that will help the stain apply evenly. I use this even when I’m using a gel stain, which isn’t penetrating, so you rarely have blotching but I still do it just as good practice.
After applying the pre-stain, I wait 20 minutes before applying the gel stain. Gel stain can be a bit tricky to work with but I LOVE the color Aged Oak by Minwax so I opted to use it anyways. I apply it on with a cloth or a brush, and then wipe it off using a lint free cloth. If it begins to dry out, I will take some mineral spirits and saturate my cloth before wiping back the stain.
Before sealing, I attached (4) T-Hinges evenly on the top piece of the bench. I didn’t have an extra set of hands here, which made it pretty difficult so I’d recommend having someone that can hold the top while you screw in the hinges in the correct places. T-Hinges are very easy to install, and pretty durable.
Finally, after waiting 24 hours for the stain to dry, I seal it in a durable polyurethane. I used my paint sprayer for this to make it go faster and apply evenly, and it worked out great. I only did 1 coat but it’s probably recommended to do at least 2 coats.
Step 7: Enjoy!
And finally, it’s time to enjoy the bench and stuff it full of all the summer things to keep them hidden/organized.